Main Contents
| Information on my Ducati Multistrada 1200 S Touring |
| My modifications including the terrific TuneBoy, Tuning, Cruise Control and QuickShifter systems. |
| and the dissapointing build/parts reliability of my bike in under 5 years, and 74,000 km |
Last updated 22 Aug 2016
Collection of manuals and instruction/installation leaflets
Rear Brake TSB
TSB / SVC / RCL list (list at ERICO MOTORSPORTS)
Latest Ducati Technical Service Bulletins (online list at AutoMD)
2010 w/s manual (link)
2010 user manual PDF
2016/17 MS Enduro w/s manual PDF
2016/17 MS Enduro user manual PDF
2016/17 MS Enduro parts PDF
DP Alarm PDF
DP Top Case Kit PDF
DP CF Tail Kit PDF
RAD Guards PDF
SW Motech header guard PDF
SW Motech crash bars PDF
SW Motech HAWK lighmounts (radiator discontinued )PDF
SW Motech HAWK lighmounts (fairing) PDF
SW Motech HAWK lighmounts (crashbar) PDF
SW Motech On/Off road footpegs PDF (actual height unknown)
Denali D2 lights PDF
Visi-Tec SUPABRAKE
Algo :
Schematic :
User Guide
MIVV decat PDF
MIVV decat and SUONO PDF
FAT DUC O2 manipulator PDF
Touratech Handguards PDF
Touratech spolier for Handguards PDF
Touratech Light Mounts PDF
Touratech GPS Mount PDF
Android Data Logger for TuneBoyTrim instructions (PDF)
Cruise Control Nudge Buttons PDF
Link to PDF diag. of Plug Connections for Nudge Buttons and QS
Exploring Inside the HFKU PDF
Cordona SG instructions
AutoDoctor WiFi ELM327
Nolan B5 Intercom
Favorite Vendors
Twisted Throttle
SW Motech
Motorrad Garage
Rad Guards
Motorcycle Headlight Protection Australia
Touratech (in Oz)
The Good Wool Store
MotoComposites (Hign Quality Carbon Fiber....)
Tables
bolt conversion tables
Pro Bolt Guide from Pro-Bolt
Great Multistrada 1200 links
Ducati.ms Multistrada forum
AndyW-Inuk's Ducati Multistrada 1200 Information Resource
Ducati Spot forum
Photos for my Ducati.ms uploads
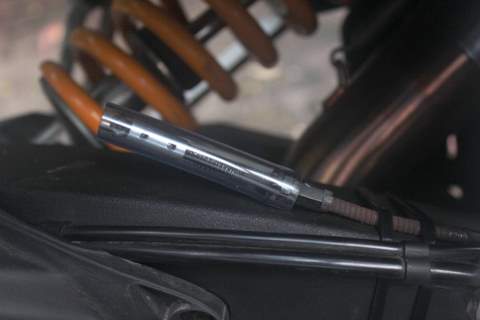 | EXVL spring (MIVV)aka "MIVV's springy thingy".
|
|
Rubber Strips aka "Tampone Elastico" This is where they go ...
|
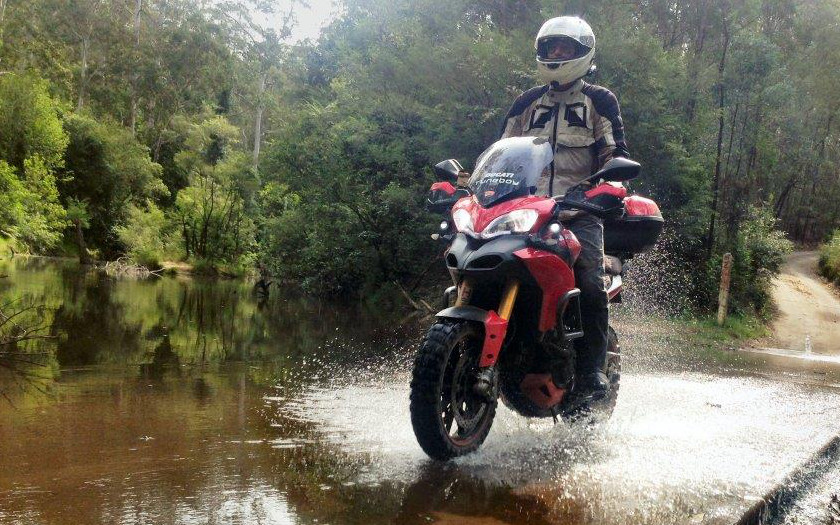
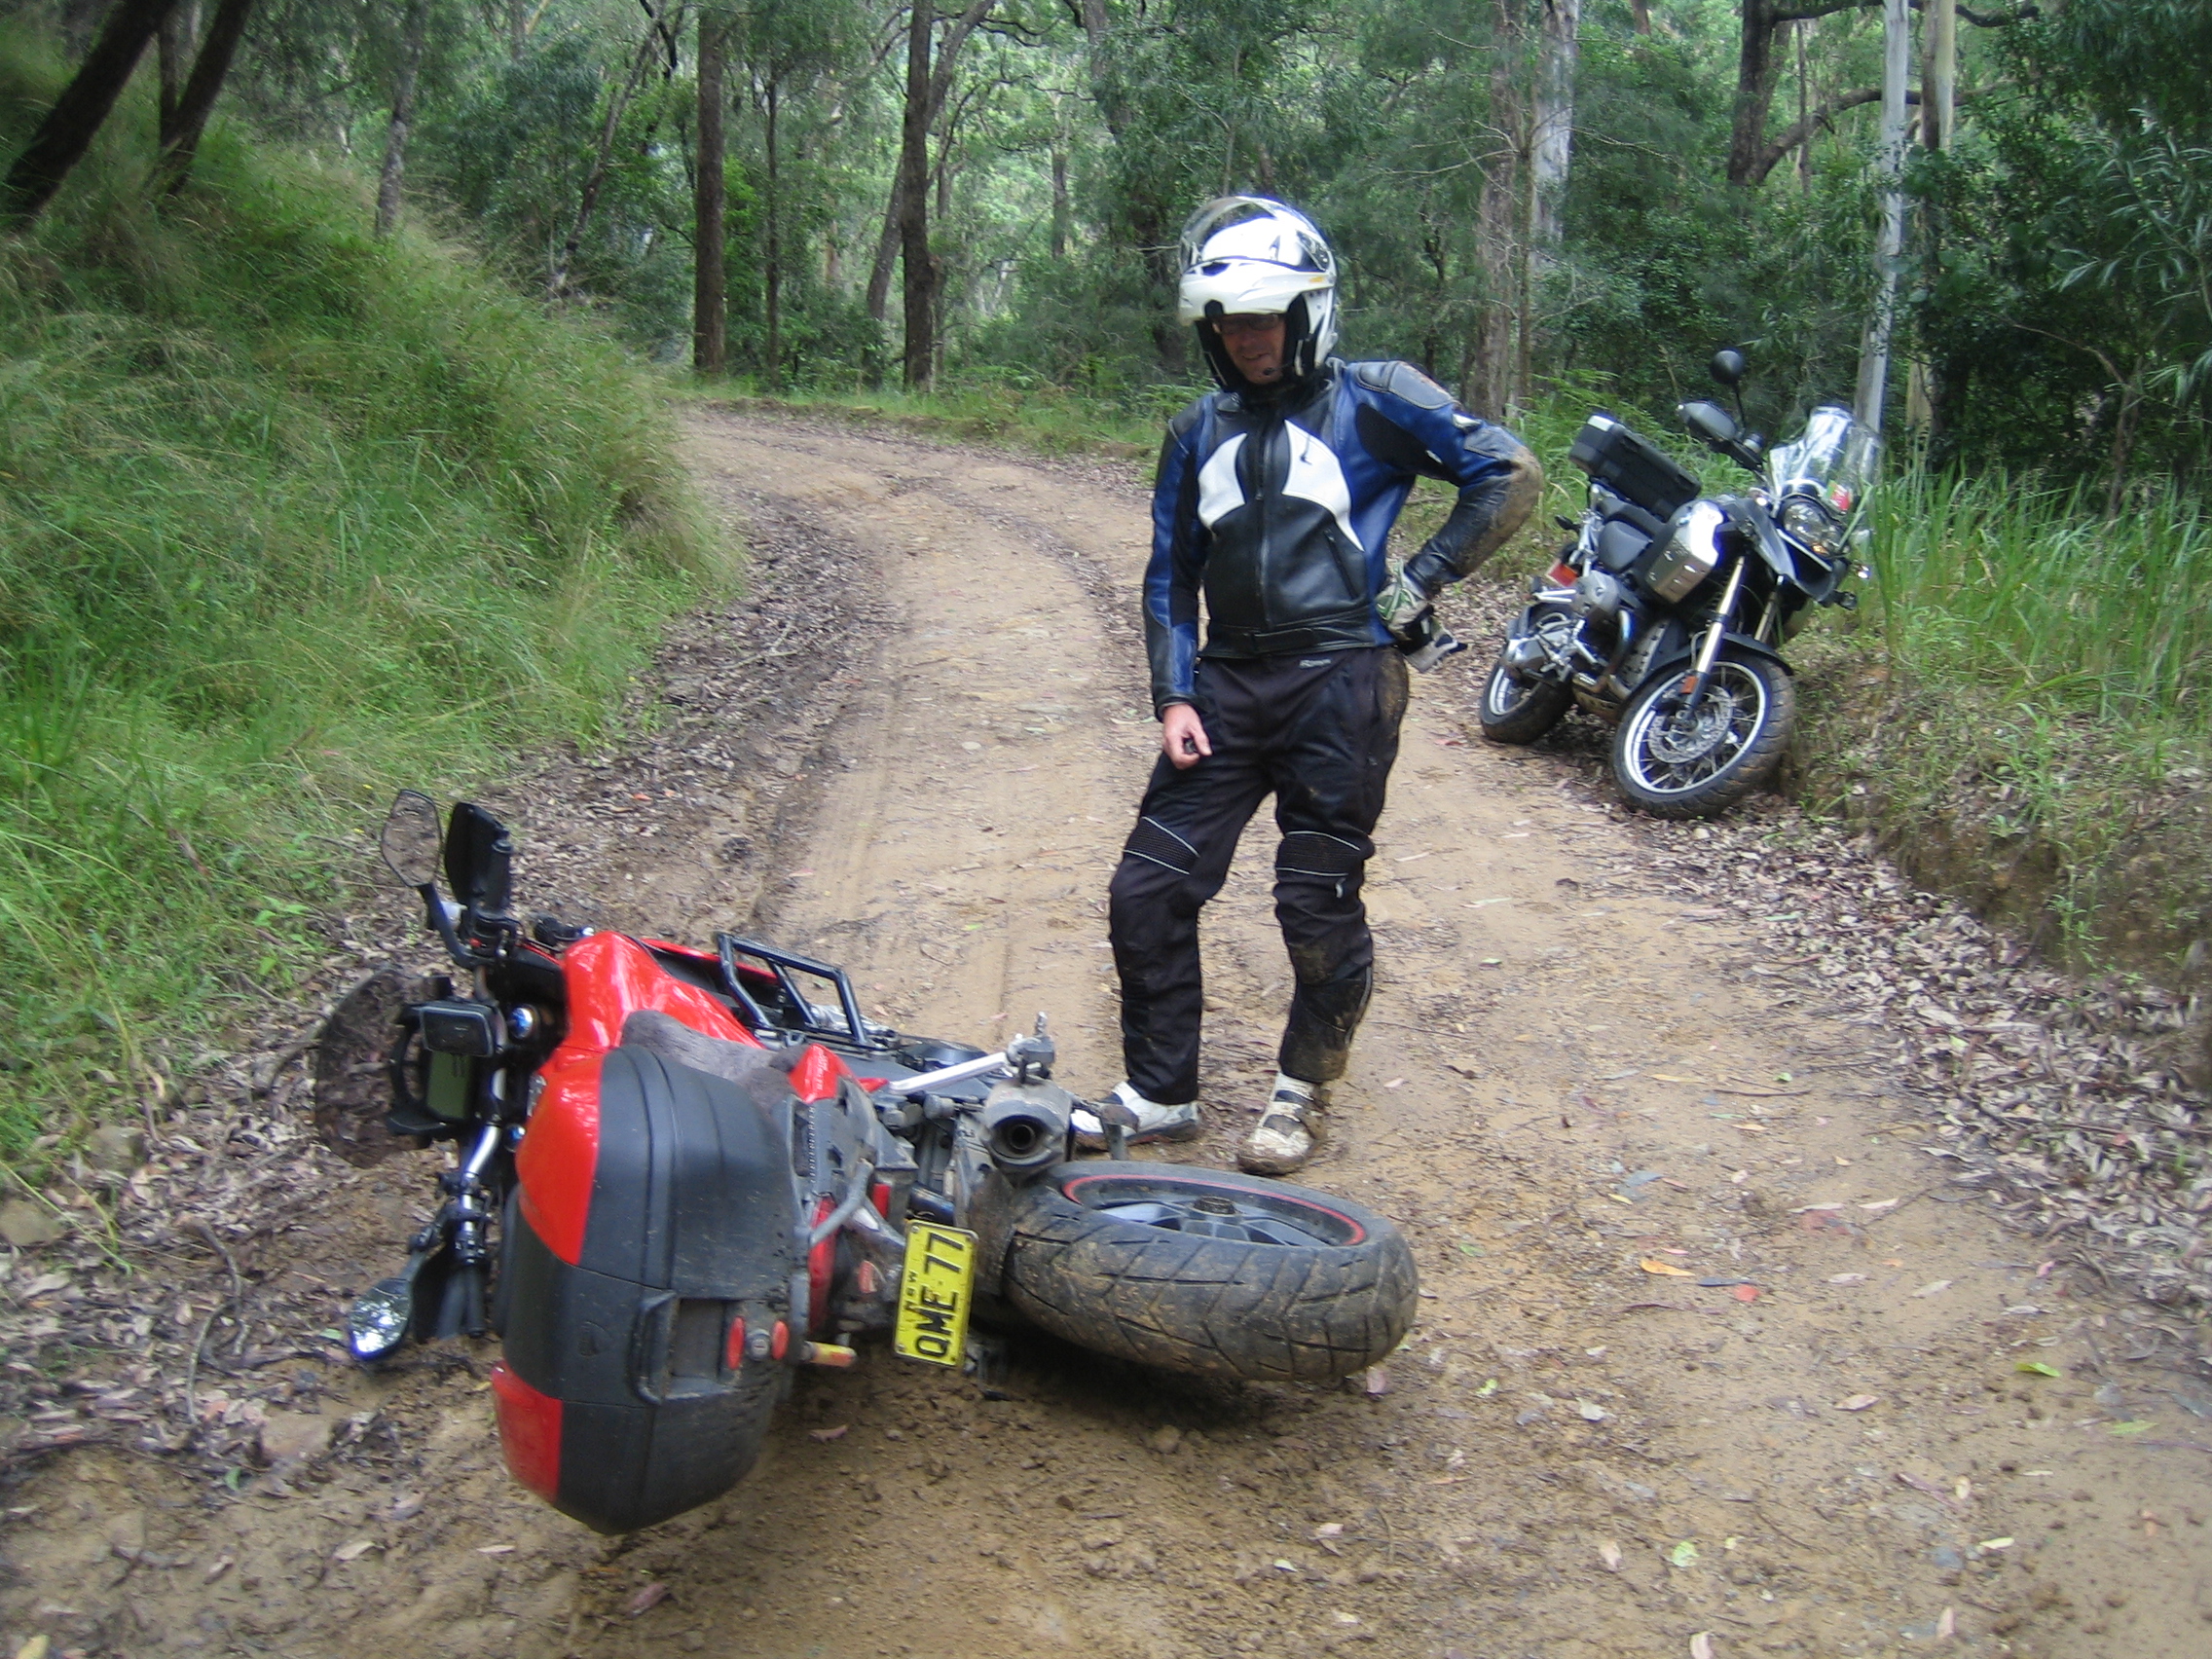
Polkolbin Ride - doesn't look that hard !
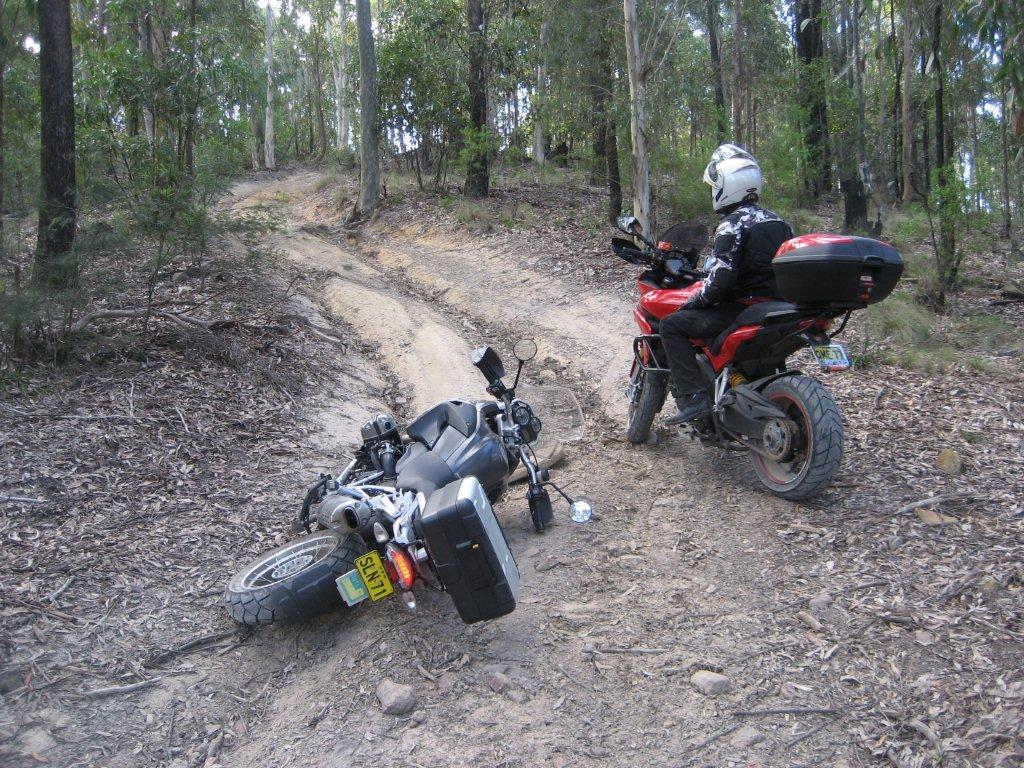 | Man Down.
|
Polkolbin Ride - Oh OH
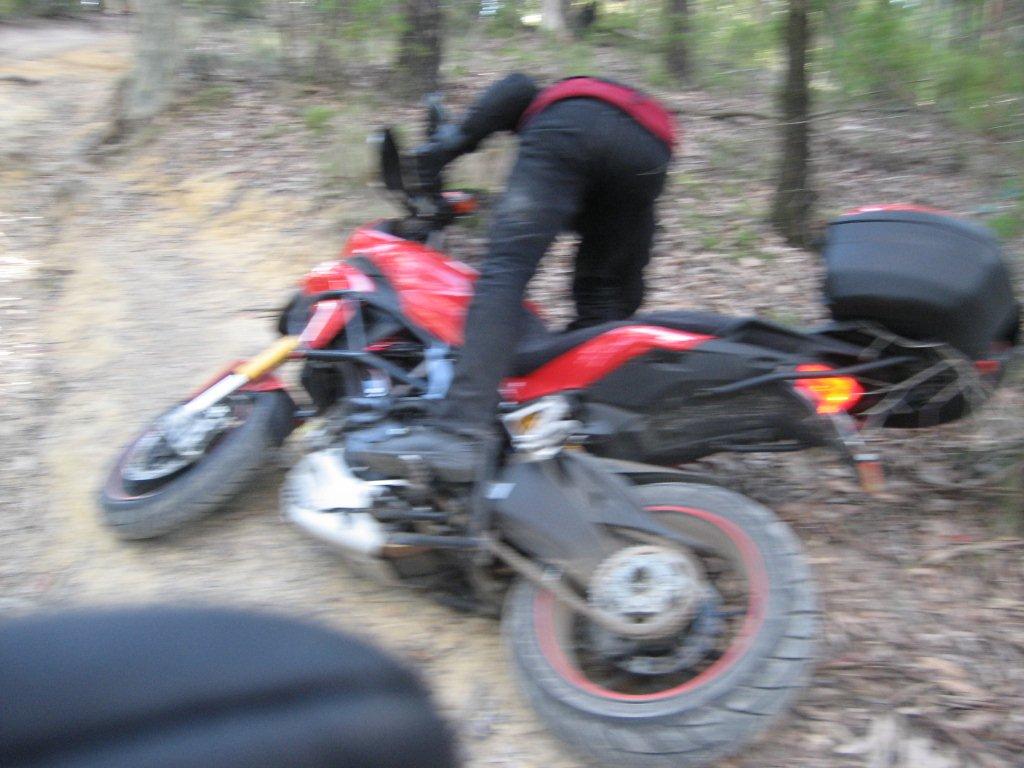 | My Turn.
|
Polkolbin Ride - see what I did wrong ??
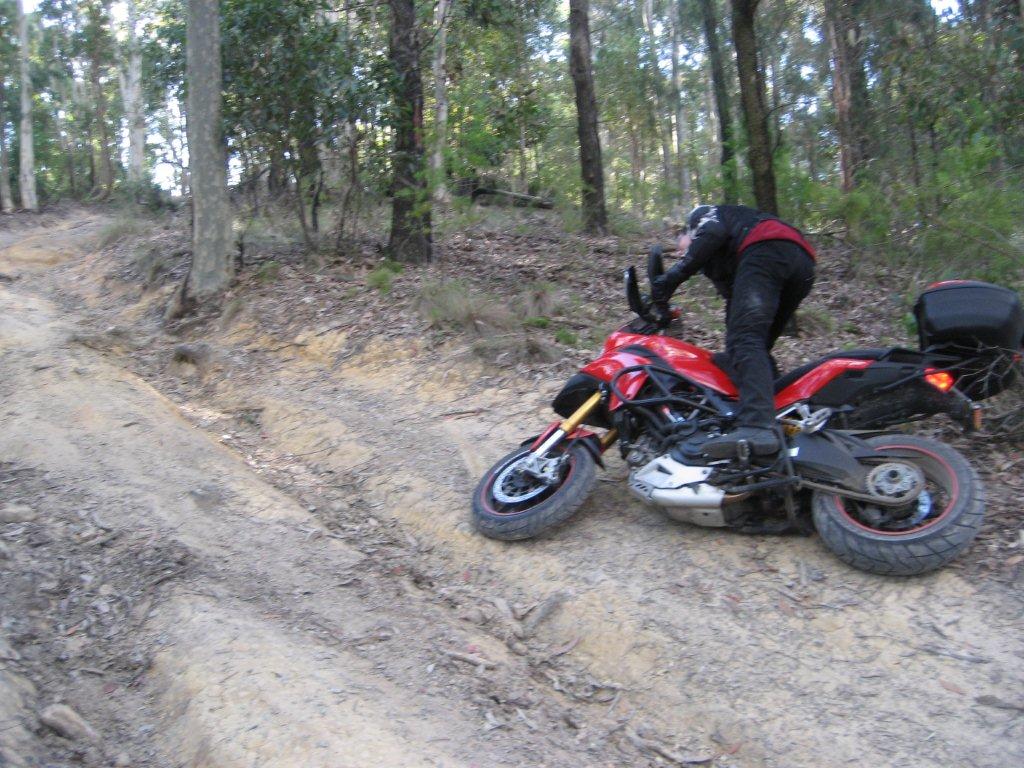 | Thank goodness for crash bars!.
|
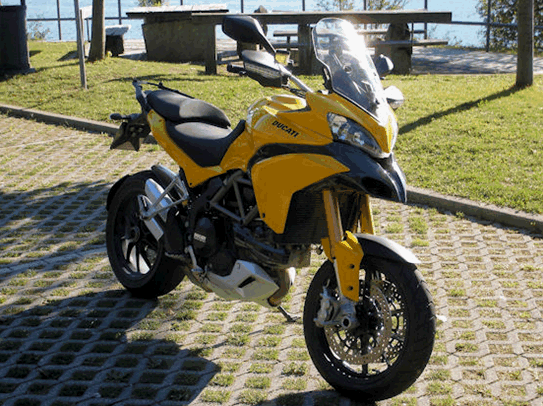
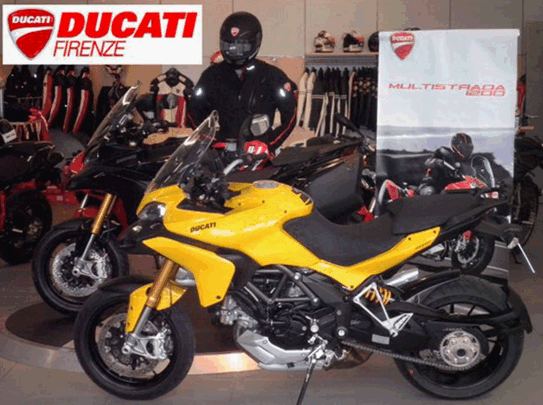
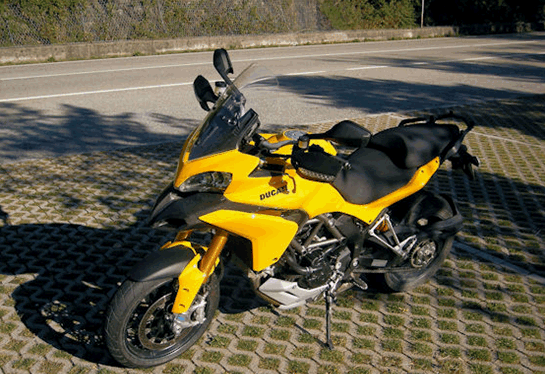
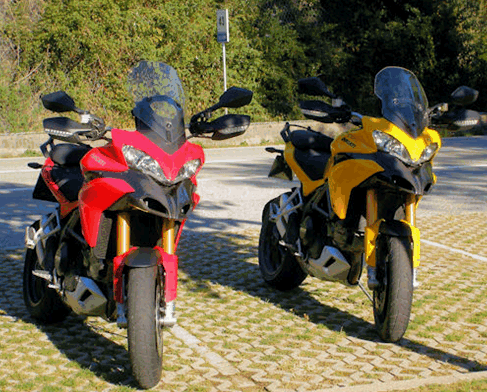
Killer in Yellow !
  |
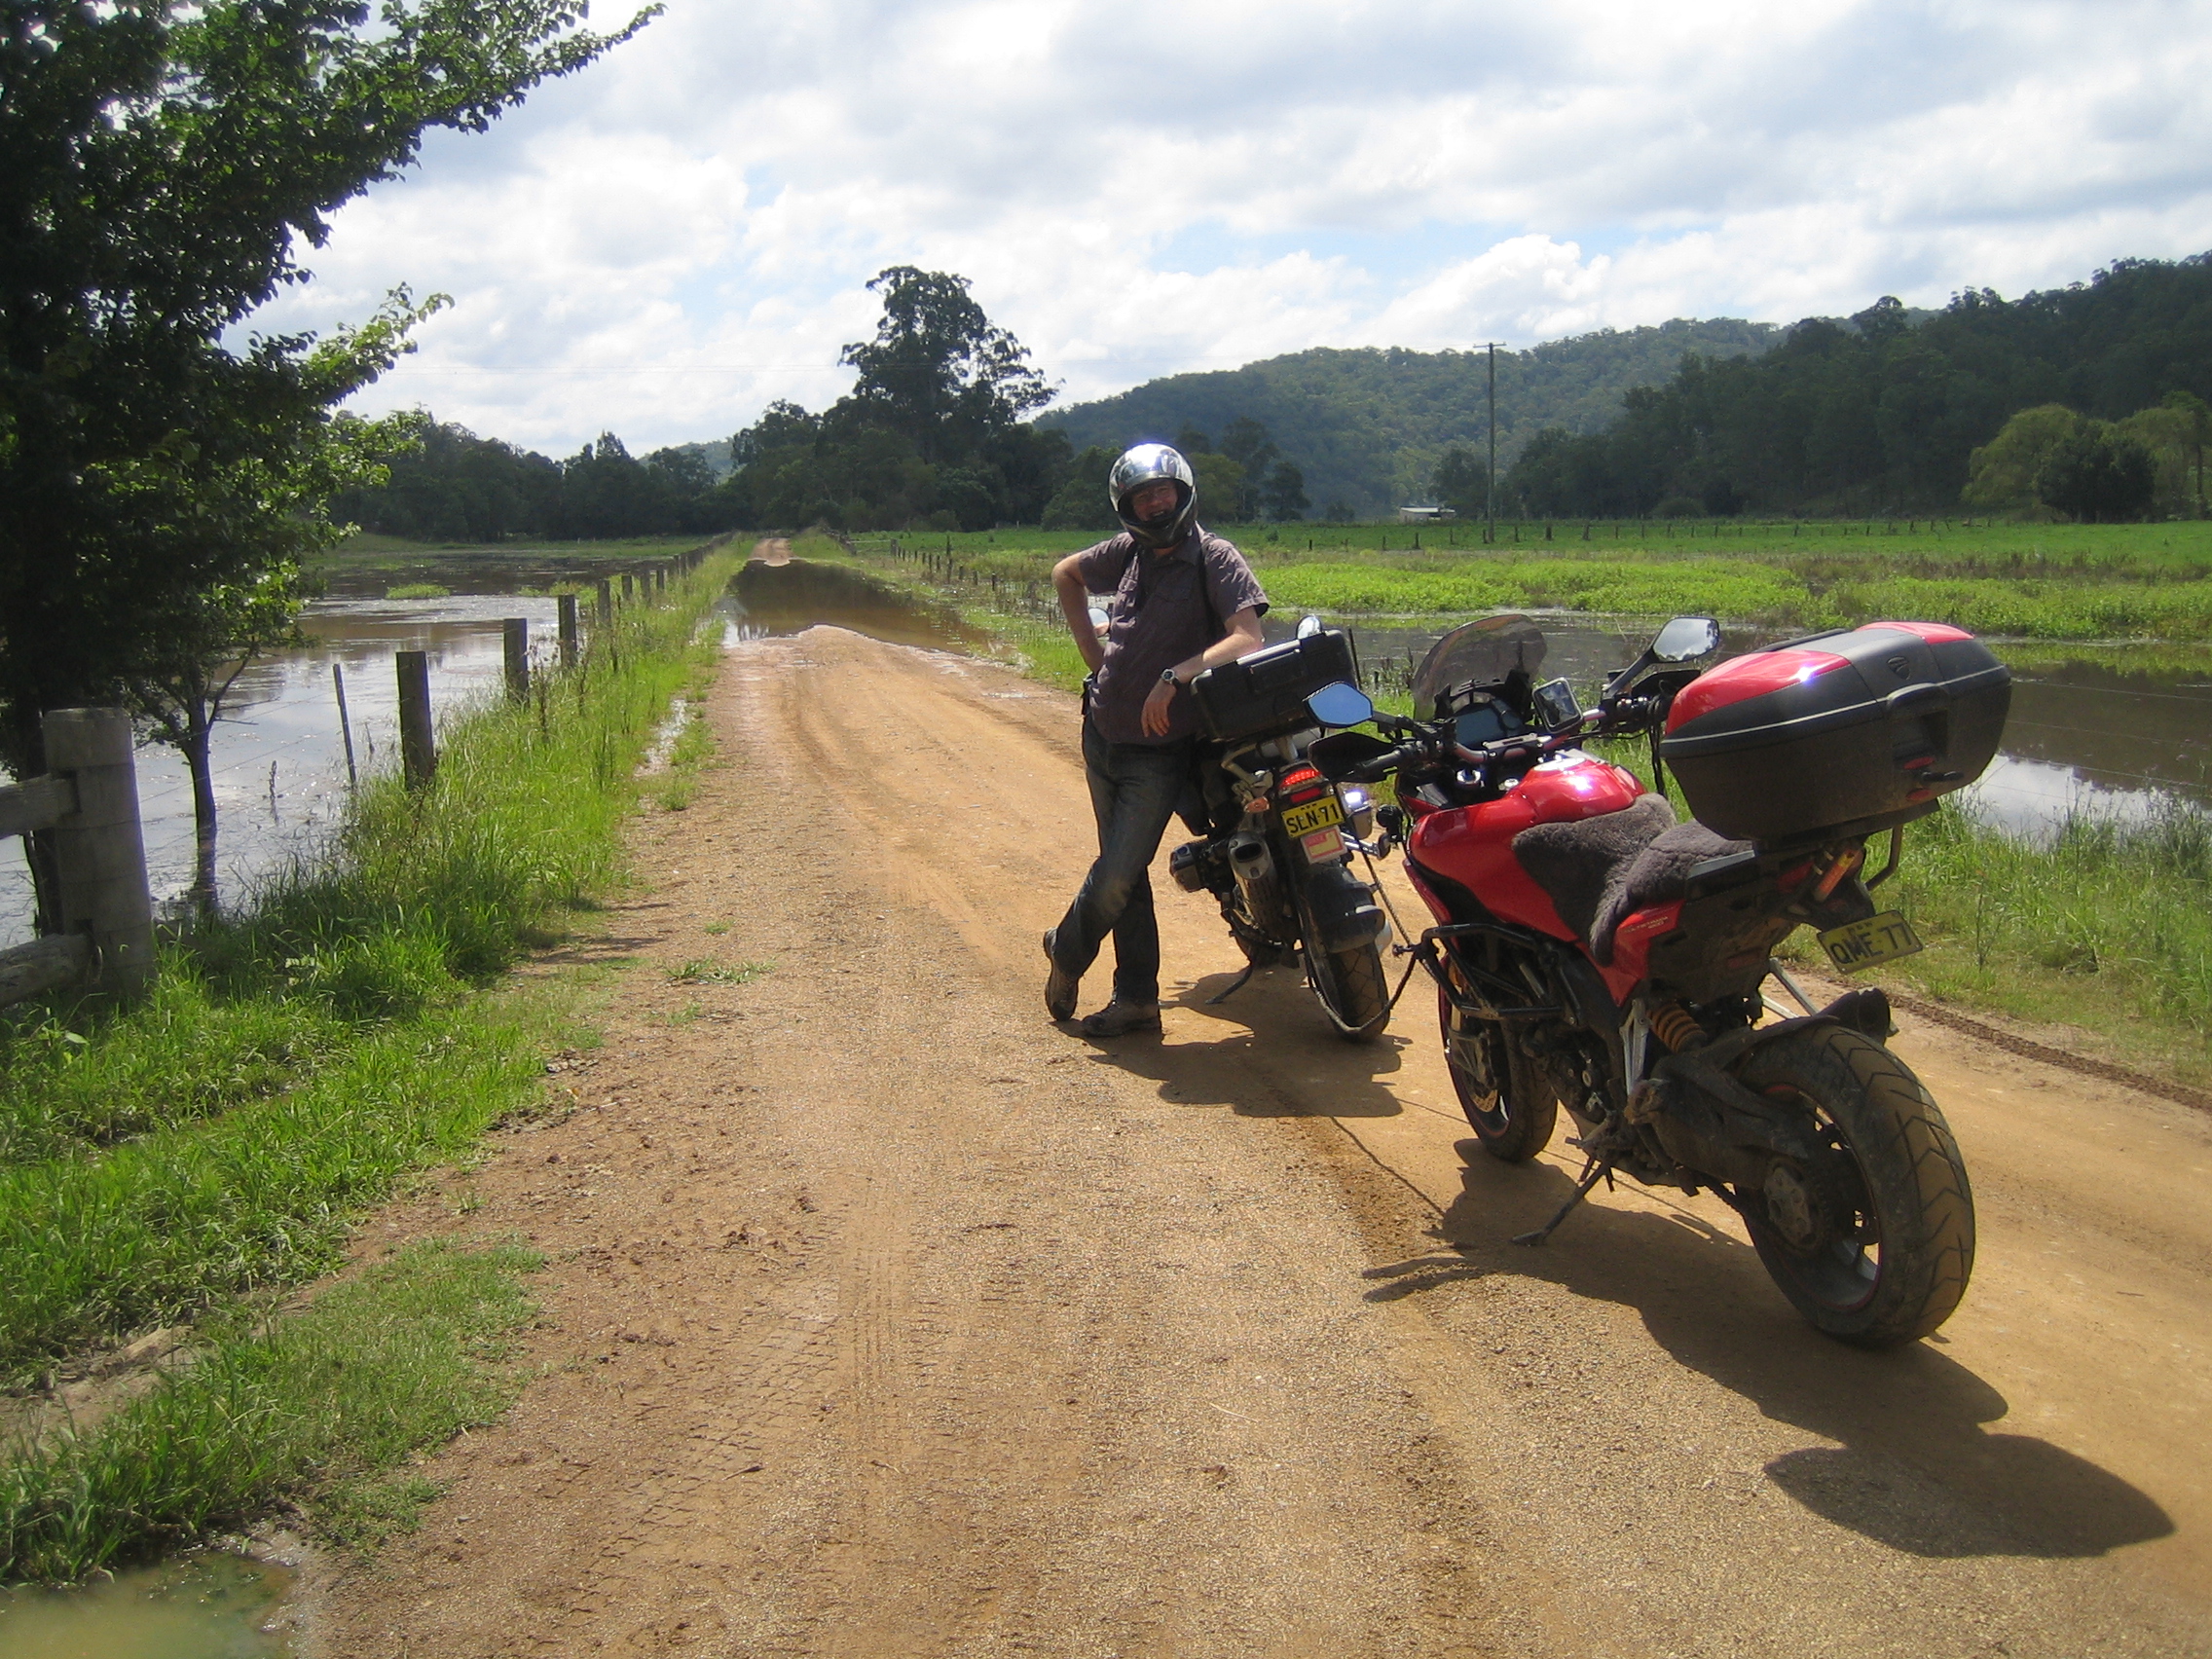
Wattagans Ride
 |
Wattagans Ride
 |
Wattagans Ride (walk of shame)
 |
driveway spill
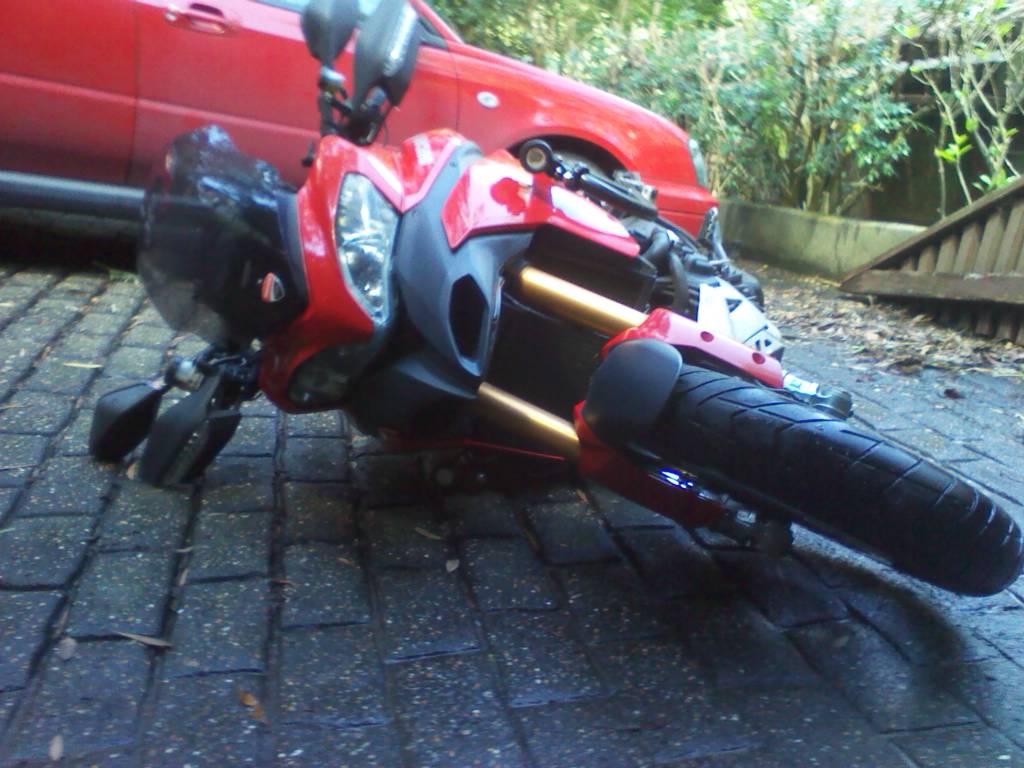 |
driveway spill
 |
| Wet mark on front header.
|
my gouged timing belt cover.
|
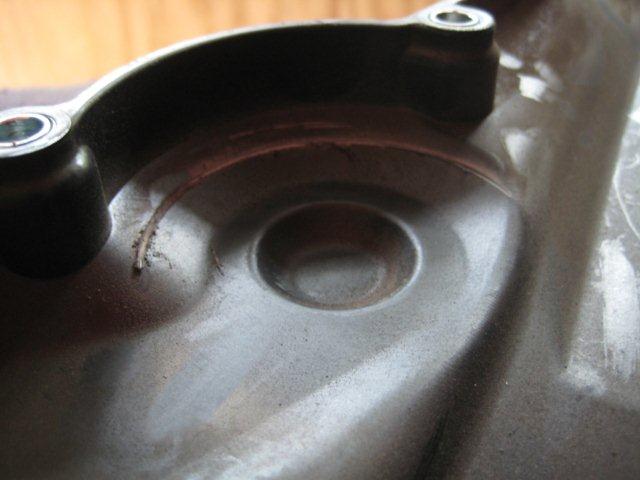
Gouged timing belt cover.
|
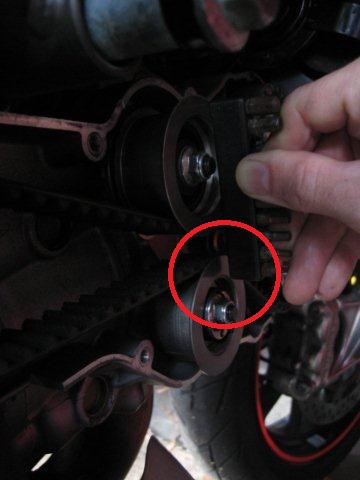
See the gap? Top pulley further out than bottom.
|
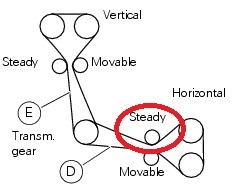
This pulley here.
|
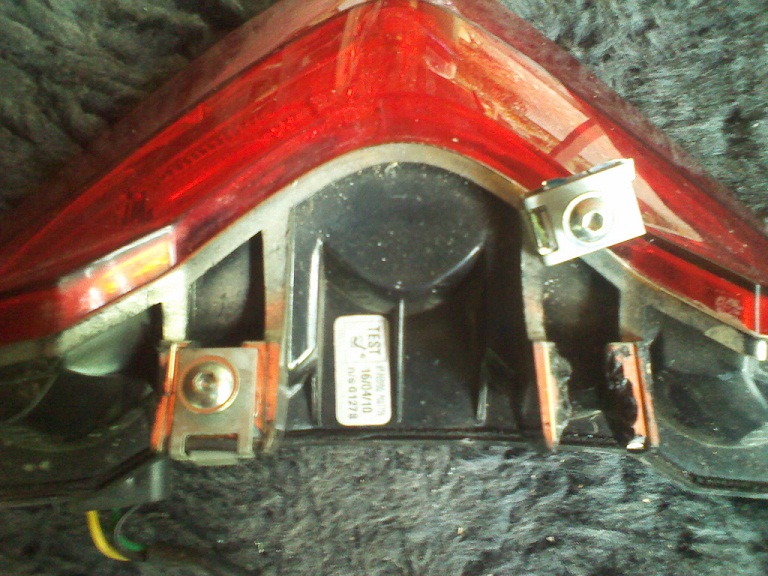
Broken! - Both stop light mounting tabs (plastic!).
|
Multistrada 1200 / Ducati ... Videos
http://youtu.be/prl-sjzK5PM
Known Issues
( The Issues in RED were on my 2010 MSTD1200S Touring)
| Issue | comment | Work Around ? |
| Fuelling |
Mostly due to stringent EPA type regulations
Generally masked over by making the mixture richer
| Some of the accepted workarounds include :
low tech - O2 manipulators, Temp manipulators etc.
PC-V or similar addon and maps
ECU re-maps
|
| Bags Leaking |
The 1st gen bags were noted to leak in wet weather due to the
front and rear edges not closing up hard enough, leaving a small gap.
|
Fixed nicley with the addition (or retro fit) of 2 clasps on each bag
(must admit mine were fine) |
| Hands Free fails (bike wont turn on) |
A number of threads on this issue. some failure modes have been :
Failed Hands Free unit, broken or disconnected antenae, (battery failed in key), iPhone interferance
and known HotSpot (RF) locations |
for failed units there is only replacement.
For instances of RF or iPhone interferance, just keep away...
If all else fails there's always the 'button' on the tank + PIN code method |
| Hands Free Tank Filler wont open |
A number of reports that the tank wont open.
|
Gentle downward pressure on the lid as you lift the latch might help
Wait a couple of minutes, turn the bike on and off again
Carry a 4mm Allen Key... Just in case ...
|
| Starter Switch (button) |
Is suspected of causing battery drain if the on/off switch is left in the down position
|
the accepted workaround is to remember to leave it up when you walk away from the bike
in addition many of these were replaced as part of an upgrade/recall |
| Wind noise |
All aftermarket screens claim reduced noise.
a number of riders have added 'longer' mounting hardware to move the
screen forward and more upright. This seems the most effective to date |
Some aftermarket alternative include :
palmer products screen adjuster
add on lifters to move the screen forward
other screens ... etc |
| DES failures rear |
Mechanical - the whole rear shock adjusting system fails
Electronic - the DES ECU fails
In some cases firmware issues resulted in erroneus error messages |
For the 'Mechanical' no work around, just replace it (the entire assembly)
(mine was the 4th my dealer had seen).
For the ECU. usually only affects on changing to/from one or two 'modes'
switching off and on again resets the 'check engine' light.
Could just be firmware |
| DES failures front |
Electronic - the DES ECU fails
|
On my bike this proved to be a loose pin in the connector plug on the RH fork.
This loose pin just needed to be seated back down inside the plug.
In addition I have cable tied the cable to the bars so there is no flexing at the plug.
|
| Clutch Slave Cylinder |
The piston in the clutch slave cylinder is a sloppy fit and can
jam causing either inablilty to engage the clutch, or worse still,
sporadic behviour when dis-engaing |
no work around, just replace it. |
| Head Issues |
Hmpf...
Blown front head!!. need I say more
WTF does 'porus head casting' mean anyway !?!?!?
4 of these in a small sample here on Oz alone !!!
(mine was the 2nd one my dealer had seen.
If your bike is blowing exxessive white smoke
If your bike starts real rough, backfiring and coughing, but run OK warm
If your bike is losing coolant
If your bike 'smells' like coolant
Get This Checked! (A single head costs approx $3000 Oz)
apart from the head it could also mean radiator and / or valve problems too !
|
Have you seen the new Triumph Explorer comming out next year ?
|
| Oil Leaks |
Front Cylinder |
Oil leaks from bottom right stud
Oil leaks from head gasket
Oil leaks from Oil filter seal
oil leaks from oil strainer
oil leaks from rocker cover gasket
|
| Front end 'clunk' from forks |
Some say it's the windscreen
Some say it's the oil cooler - check the rubber gromet to the nose cone is still inplace
Some say it's the brakes
Some say it;s the suspension - try more pre-load
Ohlins suggest it *may* be fixed by adding a small shim on each leg
|
try it all... |
| poor Rear brake |
Using the rear brake requires a lot of pedal travel, and needs a firm foot to get good hold
especially on a steep hill |
There is a Technical service bulletin out on this. Your dealer *should* know about it ...
Rear Brake TSB |
| Radiator failures |
Blockages and a few cases where the 'divider' forcing the
water through the cooling fins was missing, causing the water to simply circulate (drop?)
straight through without cooling
some early reports of 'swarf' blockages inside the engine castings too ...
Some indication the HAWK brakets might cause cracking
Mine simply failed suddenly and in a gush of coolant on the driveway at Frasers
|
Don't use the HAWK mounts, contact your vendor for the redesigned replacements or use TEchMounts |
| Fuel tank swelling |
Countries using high proportions of Ethanol in their fuel
seem to be at risk of the dreaded fuel tank swelling issue |
Is this only a US thing ?
some have tried coating the inside of the tank with some sort of resin
(not sure how that stops the swelling)
Looks like the Class Action Lawsuit in the US, has provided a (5year?) replacement offer ? |
| panel nuts in fueltank panels spinning |
Makes it decidedly difficult, to take the tank panels off |
gently heating the plastic and resetting the nut in place.
(assumes you can get it all apart first ...)
|
| Right hand footpeg position |
Makes you need to 'twist' the front of your foot inwards to use the brake, as your heel
is pushed out to avoid the exhaust. Some, (including myself), have indicated that this
can be 'uncomfortable' if you have a crook or 'older model' knee.
|
maybe try aftermarket foot pegs with a lower setting ?
several others available now ranging in price from SW Motech at about $120 through
to Ducati Performance at around $900.
|
| Heated Hand Grip rubber wearing out quickly |
Heated grips reportedly wear out pretty quickly
As they're about $300 to replace, this sux ! |
Don't hold the grips so tight. Always wear gloves. Swap them around to spread the wear.
cover them with cricket bat handle rubber or pussy grips.
|
| StopTail light Assy breaks off it's mounts |
The entire weight of the stoptail light is cantelievered
off two small plastic tabs. With enough regular movement, these break off. |
Make sure the light Assy has no free play. Install a 'good sized gob' of silicone or glue
between the StopTail Assy and the fender, to take the weight of the assy.
(see photos)
|
| Timing belt pulley gouges inside of belt cover |
(On my bike) a timing belt pully has gouged the inside of the timing belt cover.
|
Alignment issue ?!?
Shop inspected all and says says can't find a reason for this.
(see photos) |
|
Fuel sensor in tank fails
|
| Limited Extended Warranty Options (In Oz) |
The Importer, NF Imports, says "NFI"
My dealer suggests Swann
Have also found links now to :
Allianz
Australian Warranty Network
Esanda
Stratton Assure
(and Swann)
HERE
|
Pick one and hope or just suck it and see |
| That's alotta 'known faults' |
C'mon Ducati.. You gotta be shittin' us ... |
Dunno 'bout you, but I can't afford an expensive
but unreliable bike |
| May 2012 RADIATOR FAILED |
Was lucky. Was at Frasers when it went.
|
Fixed quickly under warranty (but it took 2 weeks for a chain!?!) |
| July 2012 Fuel Sensor failed (twice) |
Fuel guage and all associated readings FKD
Guage blinking
ECL light on
Low fuel light on
very distracting !
|
Fixed twice under warranty |
| Sept 2012 suspect Clutch Slave leaking (again) |
Clutch fulid dissapearing (possibly into engine)
|
O-ring damaged by shop when they replaced the slave cylinder
I have replaced this unit with an Oberon. |
| Sept 2012 Steering Lock switches failed |
Hands free rarley detects the steering lock position
|
TBD |
| July 2013 Rear head failed |
F!@#K F!@#$KING F!@#$%K
|
$2800 in labor to repair |
| Sept 2013 Fork Seals failed |
RHS fork seal blown
|
Seems Im not alone |
| Nov 2013 Front BRAKE cable failed |
Front Brake cable worn through by plastic guard.
See Johans posts and pictures.
|
This should be a re-call !!
and a warning to everyone.
check your brake lines |
| End 2013 - Throttle cable issue |
Either damaged during assemly or shop damaged during an engine out/in
|
Replaced throttle cable with new and found old cable had badly worn through
the top of the radiator housing. (Explains radiator failure above)
This cable routing is a known defect and the shop told me
it was fixed as part of standard recall work. ... Obviosly someone lied ! |
| End 2014 - Fuel sensor failed again |
These must be consumable items huh ?!? |
Replaced with a 2nd unit from ebay |
| Jan 2015 Master clutch cylinder leaking at piston |
rubber dust boot has disintegrated, this may have lead to
premature wear of the seal.
|
Although the boot can (now) be purchased, a cylinder kit is not available
which means a whole new unit required
It might be worth noting that once the boot is off you have easy access to the internals, so reconditioning might not be impossible... |
| Mar 2nd 2015 - Fuel sensor failed yet again |
These must be consumable items huh ?!? |
This is the 4th one to fail in my bike
W.T.F! am I doing wrong ?!? |
A brief timeline of warranty and other issues
| Date | Issue |
| From new | Rear Brake not effective |
| FEB2011 | DES error: Rear Suspension Unit - mechanical failure |
| MAR2011 | DES error: firmware |
| MAR2011 | Clutch Slave cylinder 'jamming' |
| JUN2011 | DES error again |
| JUL2011 | ECU dead after f/ware updates in shop - NFI to attend |
| Nov2011 | Front head leaking coolant - described as porous head failure |
| MAY2012 | Radiator - catastrophic failure (fortunatley right at FRASERS) |
| AUG2012 | Clutch slave cylinder leaking internally - replaced with Oberon unit |
| JUL2012 | Fuel sensor failed and replaced |
| AUG2012 | Fuel sensor failed AGAIN and replaced |
| SEP2012 | Hands Free unit - not locking - ignoring it |
| MAY2013 | Dash board oil warning light glows when in neutral or indicators blinking - ignoring it |
| JUL2013 | And now the Rear Head has failed. |
| Dec2013 | Replaced the throttle cable broken by the shop and found
the old cable routing was wearing through the radiator housing (heading for ANOTHER radiator failure) |
| DEC2013 | Front Brake line worn through by plastic mudguard |
| Feb 2015 | Replaced leaking clutch Master Cylinder
as a side note: the dust boot is a replacable part Ducati part 61240391A
also available from KTM as part 61013008000
|
| MAR2015 | Fuel sensor failed AGAIN (4th sensor in under 5 years) |
More Dumb Stuff from the design team at Ducati
Ducati (or any manufacturer) should do better
Center Stand interferance with left foot
Center Stand interferance with oil changes
Exhaust in the way for rear wheel removal
seat key lock on same side as (hot) exhaust
no hazzard lights
some accessories not well thought out (or not designed to work together)
eg: CF tail indicators hidden by rack and topbox sub frame.
the promised TPMS never got off the drawingboard
all those sensors and servos, and yet no built in cruise control option ?
Handsfree filler has no 'manual unlock' in the case of a failure
'some' displays should be retained as selcted operating displays eg 'voltage' etc.
The most exciting enhancement since ... well .... FOREVER!
Electronic Cruise control.
August 2012
Ever since the Multistrada1200 came out, owners have been asking/longing for Electronic Cuise Control.
The bike itself has all the sensors and actuators required, but for some reason, Ducati have deemed this is NOT a
viable option to impliment. (Apparently not seen as a 'customer request')...
In less than two months, working by himself,
Wayne from TUNEBOY has done it!
There are some conciderations regarding implimentation, depending on what sort of exhaust system you have.
For a standard exhaust system (or one with O2 sensors enabled), then there is no real alternative but to stick
with the 'starter button only' version.
On the other hand, if you have had your O2 sensors disabled, then you can cobble together a couple of LED's and switches
wired with appropriate resitors, and have the O2 sensor plugs read the switches and work the LED's.
The recommendation is to have your bike custom tuned for your exhaust, and have the O2 sensors disabled.
It's really important to realize that the CC depends on the fact that a small increase in throttle 'should' equate to a small increase in
engine RMP. It was interesting to note that my bike did NOT do this with the standard map and MIV pipe. In fact there were a few 'holes'
where a small increase in throttle actually caused a small DECREASE in RPM!.
The initial version used only the starter button to ENABLE and SET the 'Cruise.
This meant that if you tried accessing your heated grips, there was some
possibility of 're-setting' or engaging the CC if it was already engaged or enabled.
The next version addressed firing the LED's (using the O2 sensor heater element control), to indicate ENABLED and
ENGAGED states.
And smoothed out the recovery after overtaking.
(V1 was a bit scary until you knew what to expect and how to tame it!)
The next version implimented Nudge UP/DOWN buttons, and also allowed for SETting 'Cruise using these,
(Makes it easier to use, and doesn't bring up the Heated Grips menu).
Also tweaked in this version, is the manner in which the CC shuts the throttle off when you hit the brakes,
making the roll-off smoother.
i.e: You still get immediate shutdown if disengaged by clutch, but a proportional roll-off if disengaged by brake action.
Sept 2012
There are a whole bunch of new enhancements comming soon.
- Ability to SET a new higher speed during acceleration (eg: overtaking and then staying at the new speed).
- Nudge up in 1kph steps but nudge down in -5kph steps
- Pause CC and coast down to a slower speed and re-set there.
- flashing the LED to confirm a button push
- possibly displaying the 'set' speed in the round window.
Oct 2012
New CC software allows :-
- Ability to SET a new higher speed during acceleration (eg: overtaking and then staying at the new speed).
- Nudge up/down in 1kph steps
- flash the LED to confirm a button push
- flashing LED indicates YOU have accelarated beyond the CC set speed (ie overtaking).
new thoughts are :-
maybe CC should just be 'ON' all the time, and you just engage/disengage as required.
If the CC detects a 'wierd' voltage on the O2 sensor port, it will assume this is an O2 sensor (not your nudge buttons), and disable reading the buttons.
If the CC detects that you have the optional buttons, then disable reading the 'starter button' so the heated grip menu works without affecting CC.
March 2013
Nudge UP button acts as SET if CC is enabled
Nudge DOWN button acts as RESUME
CC no longer just disengaes if you accelerate past 6500rpm. instead it goes to sleep untill your revs have dropped AND your speed has dropped back to normal.
The Nudge Buttons are read by the Vert Head O2 sensor input.
This means, if you want to use these optional buttons, you MUST have a custom tune that has disabled the O2 sensors.
Ready made Nudge Buttons Available
TUNEBOY can supply a readymade "plug and play" setup, which includes the TrailTech buttons and the resistor board and O2 plug,
all neatly assembled and ready to simply bolt on and plug in.
Email for details :
TuneBoy software Updates
From time to time TuneBoy will publish updates. Whilst these do get advertised on the forum, I will try and keep a list of them here as well.
Just be sure to check that the supplied update is applicable for your bike BEFORE you go and flash it !!
List of Updates
April 2013 CC update: applicable to all bikes
August 2013 CC update: applicable to 2013 MST1200 only
January 2014 Major update: applicable to ALL. Imcludes QS code and Smartphone support
From the forum (Link = http://www.ducati.ms/forums/216-2010-current-2nd-generation-watercooled/106259-mts1200-cruise-control-factory-61.html )
Latest Tune Files (exe file) (as at 11 April 2013)
Link to PDF diag. of Plug Connections for Nudge Buttons and QS
This install has the latest tune files for
 - MTS1200 (2010 to 2012)
 - MTS1200 (2013)
 - Diavel (EU,AU,SA,NZ)
 - Diavel (US)
 - Panigale

The new TuneBoyTrim program now has an option under "Tools" to clear the service indicator.
It also now has a "Config Options", this allows you to enable or disable the nudge buttons (no longer different tunes),
you can also set the way the O2 heater output is used.

This can be used for an LED to indicate the state of Cruise or you can have the O2 heater output switch on as soon as the ignition turns on,
this allows you to power anything you want from the O2 sensor plug (Radar detectors etc).

Anyone with the nudge buttons can also chose to have the resume function with the nudge buttons, this will make the nudge down button act
as a resume button if you had to disengage CC for slow traffic.

The nudge up button will set a new cruise speed.
With the nudge buttons fitted the start button is no longer used to set cruise speed.

Where do I connect the Nudge Buttons ?
(assuming you have the full Cruise and Tune package, you can install the Nudge Buttons).
Connecting the nudge buttons is simple.
On the Multistrada, the Nudge buttons connect to the VERT O2 lead (under the seat).
On the Diavel they connect to the HORIZ O2 lead (sort of down and towards the front of the bike).

See the link above for diagrams. (Plug Connections for Nudge Buttons and QS).

Also included are the standard tune files, these can be used to return the ECU to standard. You won't need a new key to change back to the TuneBoy maps,
just flash the modified map back in after your service and you are cruising again.

Please read the documentation included in the install.

The new Trim program will only work with the new maps,
Any existing trim files can be used with the new tune files and the bike will run as it did with the old tune files.
The fuel tables in the tunes are the same as the old tune files.
| Update History |
| Ver | Released | Enhancements |
| 3.11 | Jan 2014 | Code for QS and SmartPhone Apps
OT2 1.0d update for faster flashing
more robust WiFi |
| 3.14 | Feb 2014 | Multiple Trim Files
OT2 1.0e update |
| 3.15 | Apr 2014 | -- |
| 3.16 | beta | Variable QS pressure
Shift Light |
| 4.00 | May 2014 | Variable QS pressure
Shift Light | from TuneBoy |
August 7, 2013
TuneBoy has released an Update for the 2013 MST1200 that corrects the Nudge button issue and provides a greater step in the Nudge function.
This update is for 2013 model MTS1200 only !!
Update for 2013 model MTS1200 - 7 August 2013 [PHP link]
If you have a 2013 MTS1200 with the Cruise and Tuning and the nudge buttons you can download.
http://www.tuneboy.com.au/MTS1200_20...uneAndTrim.php

The zip has the following.
 - 2 x Map files.
 - Trim file for 2013 MST1200 with stanard exhaust.
 - Flash program.
 - New Trim program.

The tune for the 2013 MTS1200 with the following changes.

1. The increment for the nudge up has been changed to 1.5 kph (1 mph roughly).

2. The increment for down has been changed to 3 kph (2 mph)

3. This map has the option for a quick shifter (up and down), we have not tested this on a 2013 MTS1200.
To have the up and down shift you need a strain gauge shifter, if you want up shift only you can use any type of shifter.

4. Included in the zip is a trim file for a 2013 MTS1200 with standard exhaust (Thanks to Todd Patterson for this trim file, Pattersons in Bunbury WA).

The zip now has two tune files, it has the CruiseOnly map and the CruiseAndTune map.
Both of these are now based on the latest map from Ducati (0304).

The change to the nudge amount from +/- 1 kph to +1.5/-3 should make the bike react much quicker when you need to reduce speed.
Slowing down is always more urgent than speeding up (As Wit pointed out).

I will make these changes to the 2010-2012 MTS1200 ,Diavel and Panigale maps once I get some feedback on how it feels.

I have also made some changes to the lowest throttle point that the cruise control will go to, this should help to reduce the on/off feeling when the cruise control is right on the switch point for fuel cut.

The TuneBoyTrim program in the zip now has two service reset items, one for the Oil service and the other for the Desmo service.
I think the 2010-2012 MTS1200 uses the Desmo service reset for both oil and desmo service light resets, the Diavel, Panigale and 2013 use the Oil service for the oil service light reset.
Jan16th 2014 updates
A new update is available that supports QS code as well as provides the extra code for the HandHeld apps.
Included in this update is an update for the firmware in the OT-2 as well. (simply an executable you run on your PC)
This is really imporatant as the new FlashMitsubishi will not work with the old OT-2 firmware.
Flashing the OT-2 is very straight forward and takes about 20-30 seconds.
Apart from being a pre-requisite for the new FlashMistushi, it provides a much improved WiFi connection for the OT-2.
It's faster and absolutley reliable now.
This link provides permanant access to the " latest updates " ....
Wed 11th Feb (MultiTrim Map option)
Description
This latest update includes a NEW option to keep up to 3 Trim Maps loaded in the bike at any one time, and switch between them at startup.
It also contains a minor fix for the issue of not seeing your KILL and BLIP changes in TuneBoyTrim, which has lead to some people
trying to re-flash their bikes, when all they needed to do was turn OFF, (wait) and ON again.
Now the change is made directly and reflected back in TuneBoyTrim immediatly.
Files
The update package contains new versions of FlashMitsibishi and TuneBoyTrim, as well as the new .DAT file for the bike, and also a new update for the OT2 (Rev 0E).
Installation
[1] Update the OT-2
connect the OT-2 to your PC with the USB cable and run the update program. (Takes about 20 seconds). DONE!
[2] rename your old Flashmitsubishi.exe and Tuneboytrim.exe files to make safe copies. Copy the supplied new files to your \program files\Flashmitsubishi folder. DONE!
Flashing
Connect the OT-2 to your bike as usual.
Turn the bike on as usual
Start the flash mitsubishi program as usual
Select the new .DAT file as your TUNE
Select a trim file (as usual)
But wait! What's happened to the Trim File button?! You can now select a 2nd trim file if you like. Even a 3rd Trim file. (These are all optional)
Flash as usual.
Turn the bike off for at least 30 seconds. DONE!
Usage
To select a particular trim file. (prior to starting the engine!!).
Turn the bike ignition on.
Hold the throttle fully open. (see now why this is done 'prior to starting the engine'!)
Pull and Release the clutch.
Each time you do this, the headlight will flash, and the TACHO will indicate which Trim file you have just loaded into RAM.
: 5000RPM = 1st Trim file
: 7500RPM = 2nd Trim file
: 10000RPM = 3rd Trim file
(NB: You only need to do this, if you WANT to select a different trim file.)
It's as easy as that !!
Now just start the engine and ride away on YOUR choice of trim file...
A sample use might be :
- keeping an EveryDay trim file, a Trackday Trim file and a Work In Progress Trim file etc ...
Notes
The bike will always load which ever Trim map you last chose. (You don't have to re-select it every time).
That means, if you select #2 (as indicated by 7500rpm), then that is the trim map that will be loaded everytime you start the bike, untill you change it.
You don't need to OFF and ON the bike between selecting Trim maps. The Trim maps are loaded instantly. (Obviously the engine needs to be off)
If you only flashed in, two trim maps, instead of three, then cycling beteen them will only go back and forth between them. Don't worry, it won't try and load in a 'blank' 3rd map.
Where did I go wrong ?
Occasionally some people ask "It doesn't work... where did I go wrong" ? (Keep in mind most have no problems at all!)
If you are stuck , then the best and most accurate source of help is found at Support@tuneboy.com.au
If you are shy to ask there directly, then you could try posting on the forum in the appropriate thread,
and hopefully someone will have seen the issue and have the answer.
Don't be silly enough to think that the TuneBoy staff have infinite time to surf forums all over the
world just to find your beef !
There are a few simple steps to follow when installing for the 1st time and later on in operation.
If you're stuck, and asking for help, then it's a good idea to let people know what point
you got to with the installation.
Is the software installed on your Windows PC OK ?
OT-2 plugged into bike and the lights are on ?
Is you PC connected to the OT-2 OK ? (recommend USB cable if flashing ECU but WiFi for logging).
got your username and password emailed from TuneBoy ? (you need this to licence the software for your ECU).
did the FlashMitsibishi program start OK ?
is your bike turned on ?
did you select a 'tune file' applicable to your bike, part of the world, and options paid for ?
did the scary 'prepare ECU' operation complete ?
did you turn the bike off for at least 30 seconds, Exit FlashMistubishi, and then turn the bike back on and restart FlashMistubishi (the 1st time)
did you do it again, like it says in the instructions ?
did you do it a third time and confirm that your ECU number is now recorded in FlashMistubishi ? (yes that's your ECU number there now!)
finally, did you connect to the internet, and stop start FlashMistubi, entered your username and password, select the product type and generate a valid key ? (Whew!)
at this point you have prepared the ECU, and licenced your software... All that's left to do now is to load a 'Tune' file...
don't forget to OFF ON the bike for 30 seconds after flashing ...
A collection of tips ...
[1] Use the USB cable when flashing... Not only is it more reliable, it also means you can stay connected to your WiFi while you do the Generate Key thing.
[2] Really ... wait the 30 seconds between OFF and ON. (In fact... wait until the immobiliser starts to flash... Really !
[3] Use the WiFi for logging data. It is less suceptible to electrical noise from the engine.
[4] When you set up the Nudge Button Options, make sure you have completed the FLASH process first, including OFF/ON.
DONT just FLASH, and immediatley try and set the Nudge options. If you havn't done the OFF/ON thing, then you aint running the new code yet.
[5] Nudge Button settings are commands... not part of the TRIM file. The setting is saved directly in the ECU and nowhere else.
Asking for help.
Be specific about your problem. Your operating System. The way you are connected. What you have tried so far ...
Be sure to tell us what model and year model your bike is.
Describe the problem in detail. "doesn't work" does not = a description.
Try and use the TuneBoy Trim logging feature to record a .RAW file so we can graph and 'see' what is happening.
....(Yes I know ... but this will become easier as we get the smartphone apps out) ...
The more info you can supply, what you were doing, what did/didn't happen as expected, what does work, etc ...
The more we and everyone else has to go on !
maybe even suply the ECU number, that way we know you got at least that far ...
Simple Summary of CC Operation
Many people ask how do you operate the CC ?
In it's basic form (without Nudge Buttons), you operate the CC using the bikes STARTER button.
Enable CC : bike running, no brake, no clutch. Hold STARTER button in for 4 seconds. Bike responds with throttle blip.
SET CC: Accelerate to desired speed and push STARTER button. Bike locks to speed.
Disengage CC : pull Clutch or tap brakes.
Many people ask how does this work in conjunction with the heated grips ?
If you have the Heated Grips option on your bike, then be aware, pushing the starter button will bring up the heated grips menu.
Note that a single push or hold of the starter button (to Enable or SET CC) makes no difference to your grips setting. (Menu comes up, then goes away after 5 seconds)
However, trying to adjust your grips with CC ENABLED, will cause CC to SET and SET again ...
The prescribed recomendation for adjusting Heated Grips with CC ENABLED is :
DISENAGE CC (pull clutch or tap brakes)
Adjust Heated Grips
SET (or re-SET) the CC again
What are these Nudge Buttons you speak of ?
Optional Nudge Buttons allow you to :
adjust the SET speed, up or down
set speed if CC was disengaged
re-set to a higher speed
and resume to last set speed
You can buy a ready made plug and play unit from TuneBoy, or have a crack at making your own...
What's the middle button do ?
The middle button is NOT connected .. ie it does nothing...
The way the cct and ECU code works, there is no point in connecting it.
I chose to pull my switch unit apart and put the LED inside the middle button .... It's not easy, but it worked for me !
Why choose the TUNEBOY ?
Cost, Functions, Versatility !

Looking around at what was available for aftermarket CC options, the best option I could find at the time was from Motorcycle Cruise Control
in Melbourne.

At that point in time the system cost was est. at about $1200 and none had yet been fitted to a Multistrada.
The kit comprised entirley of it's own sensors and actuators making the install bulky and intrusive to wiring and even to Manifold. I put this into the too hard basket.

The TUNEBOY solution is entirely Software, and costs about half the price.
It adds the ability to use different fueling and ingition maps, create specific maps 'live' on the dyno,
and even offers live logging and auto tuning.
Not to mention the ability now to turn off the service indicators as well.

Usage is easy, with a Windows PC.
Plug in the WiFi box, do what you need to do, and remove the box, you're done!

As far as your dealer is concerned, your ECU looks and acts like normal.
Your service guys won't even know it's there unless you tell them.
(IT's probably a good idea to be up front and tell them! Especially if you have removed your O2 sensors plugs !!).

A solution like the PC-V or BAZAZ etc, costs about the same, but requires the permanant addition of a black box, certainly doesn't offer CC and possibly not the service clearing either.
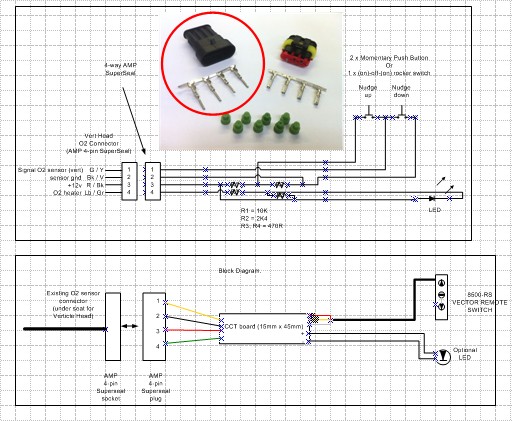
Home Brew Nudge Buttons
for those that like to tinker
a suggested CCT diag.
|
|
|
|
TrailTech Vector switches have arrived !
and they look GREAT !
|
|
|
|
The photo gives you an idea of how these will look. (Ignore the aluminium bracket below,
that will be removed!)
For my own use I'm making up a very small CCT board (approx. 15mm x 45mm) to go inline between the switch and the
AMP plug, as I can't easily get the resistors and LED inside the TrailTech switch housing.
I'm going to try putting the LED inside the switch, but realistically the LED could be mounted anywhere....
Nov 5th 2012
Mounting a 3mm LED inside the TrailTech is not too difficult, but poses great risk of breaking your switch
housing while trying to open it !!!!.
- Break the switch open carefully.
- remove the center pushbutton from the cct board and it's associated push rod
- push fit a High Intensity 3mm White LED into the hole left by removing the pushrod
... (probably a good idea to glue the LED in place so it doesn't get pushed out by an overly inquisitive button pusher)
... I also drilled the hole in the switchblock base a bit bigger, to accomodate my extra pair of wires (5mm drill bit))
- neaten up the wiring and superglue the switch housing back together.
... (be careful not to glue or lose either of the remaining two pushrods or buttons !!)
PDF instruction sheet
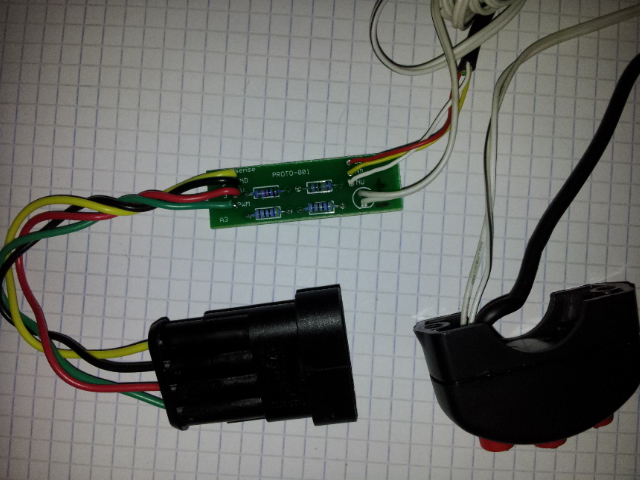
Photos of LED inside TrailTech Vector switch and Aux CCT board
High Intensity 3mm LED, push fit's into the hole
vacated by removing the middle pushrod.
Note also, the middle pushbutton is removed
from the cct board and the additional wire pair added

|
Restistor cct board photo
Note: the 4 wires from the O2 sensor on the left
and 3 wires to the TrailTech Vector switch on the right
2 additional wires for the optional LED mounted inside the switch block.
|
[WMV VIDEO] This is what the middle looks like
with a high intensity
white LED installed under it.
(I've not tested this in the real world yet) ....
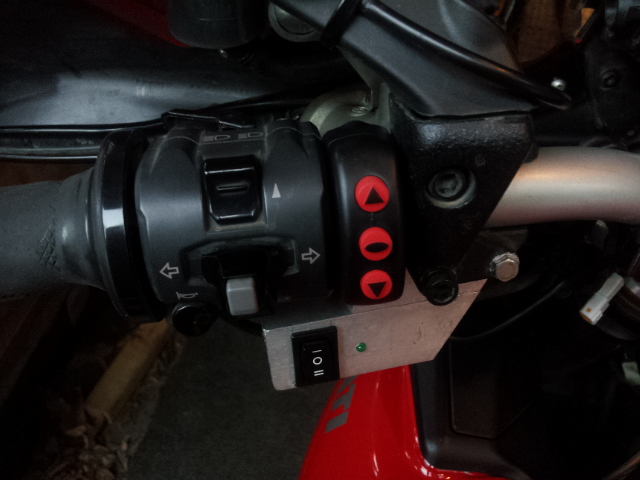
| OK Its mounted and ready !
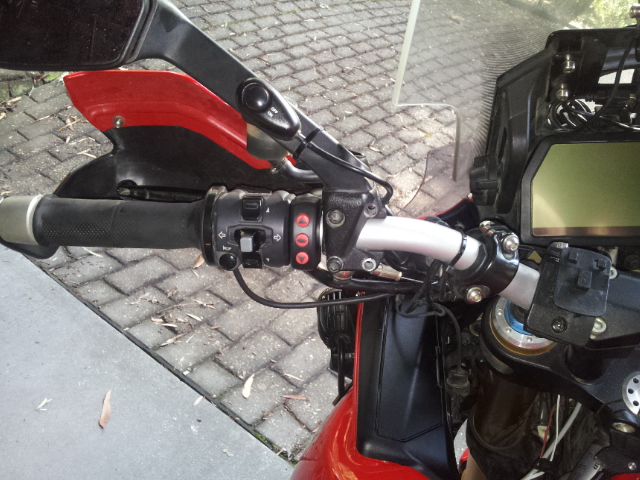
Actually mouning the switch was a little more difficult that expected due to the way both the master clutch cyl and the LH switchcluster are 'pinned' in place on the bars.
I ended up cutting the plastic 'nipple' off, from the inside of the LH switch cluster to allow me to slide it the 1mm I needed, to get the Trailtech to sit flush against the bars.
|
Nov 8th 2012 Tune Edit Kit arives !!
How nicley packaged is this !
TuneBoy QuickShifter mounted on 2010 Multistrada 1200S Touring
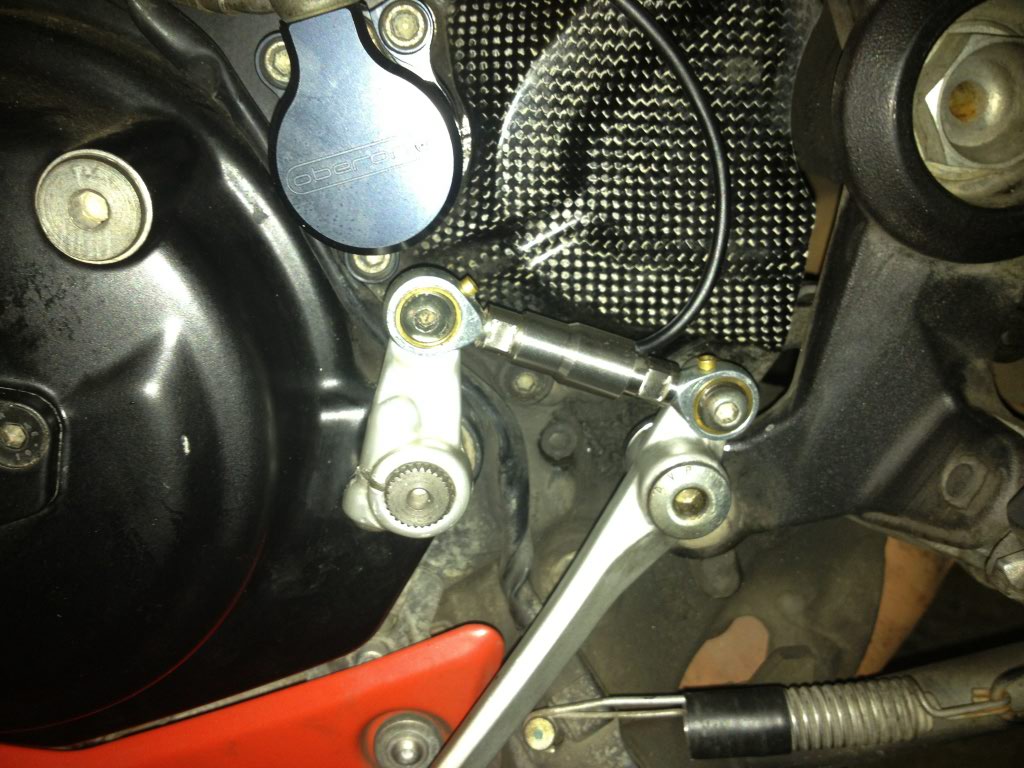
A strain gauge based Quick Shifter that offers these features :
Low cost to implement
Installs neatly in place of the existing gear linkage
Clutchless DOWNSHIFTs as well as the usual UPSHIFTS
True analogue output that allows independent tuning of the pressure required in either direction
Reverse shift configurable for you GP shifting types
Allows lightning fast, full throttle upshifts, and silky smooth, automatic throttle 'blip' downshifts.
Allows for clutchless upshifts by sensing pedal up pressure and killing throttle to unload gearbox.
Allows for clutchless downshifts too, by sensing pedal down pressure and 'blipping' throttle speed to match gearbox revs.
Independant, user tune-able pressure setting for upshift and downshift. Uses TuneBoy Trim(Windows) or iPhone or Android App.
- Electrical connection for the Multistrada 1200 is via the front cylinder O2 connector.
- Requirements are that you have the latest Tuneboy ECU flash and are using Tune or Cruise and Tune package.
Tuning with TuneBoy - notes
You don't need to flash a 'tuning' map to tune, if you already have a CC or CC and QS map.
Instead, simply disable the QS and the nudge buttons with TuneBoyTrim.
Now re-connect you O2 sensors (or install your O2 sensor and LC1).
With the nudge buttons and QS disabled, the O2 sensor heaters are ON when the engine is running.
A good tip from Wayne, regarding usage of the LC1 !
Here is a little info on the LC-1.

1. If you get funny values you should connect the serial cable and start the LM-Programmer. Check that the fuel type is set to 14.7 Gasoline.
Sometimes this value changes to some stupid number. I cannot get an answer from Innovate to explain why.

2. If you are connecting the LC-1 to the WB-01 the LC-1 must be powered on before the WB-01, if not the WB-01 will not see the LC-1.
The microcode in the WB-01 only looks for the LC-1 on power up, if it does not see the LC-1 it never looks again.
Now that I have the source code for the WB-01 I will add a command to make the WB-01 try again from time to time, this will solve that problem.

3. The message on the bottom of the TuneBoyTrim screen only applies if the LC-1 is connected to the WB-01.
If the LC-1 is just connected to the O2 sensor the TuneBoyTrim program is simply seeing the 0-5v value as it is read from the O2 sensor input.

4. It is important that the 0-5v output on the LC-1 is set correctly.
If you have the 0-5v set to the Innovate default values then the drop down box in the TuneBoyTrim target screen should be set to "Innovate LC-1".
If you have the 0-5v of the LC-1 set to 10/1 to 20/1 then the drop down should be set to "Generic 0-5v".

I always check the calibration of the LC-1 with the LM-Programmer before I use the LC-1, it saves lots of head scratching.
|
Android Access to your MultiStrada 1200 and TuneBoy
MultiTool
With the release of the V3 and later TuneBoy software, the 'MultiTool' Android App also became supported.
Currently the MultiTool is under Beta test and is available to Beta Testers,
directly
from the Google Play-Store.
On-Line help, (the manual), for the MultiTool can be found here.
To become a Beta Tester, find the MultiTool Google Group, (yes .. in Google Groups).. and request to become a member.
I try to check the pending requests every couple of weeks....
Beta Testers can download the latest pre-release directly from the Play Store
MultiTool Lite
is a cut down version of Multitool, supporting ONLY service reminder resets, and ODO wind forward.
Availability is as above...
I have a Windows version similar to MultiTool Lite on the way.
MultiTool decaf
In testing now ....

Farkle List
Now with added "Cruise Control","QuickShift" and "ShiftLight" from TuneBoy
RED 2010 S Touring +
DP Top box + HFF + Alarm
11-Aug-2010
-----------------------------------------------------------------
Current Issues
- Steering lock sensor switches playing up
-----------------------------------------------------------------
Latest Farkels
- Custom Tuned Maps
- Electronic Cruise Control
-----------------------------------------------------------------
MODIFICATIONS and FARKLES
DP CF tail tidy - (www.proitalia.com)
RadGuards - (radiator + oil cooler) (www.radguard.com.au)
SW Motech header guard - (www.motorradgarage.com.au)
SW Motech crash bars - (www.motorradgarage.com.au)
SW Motech Hawk radiator light mounts - (removed due to recall)
SW Motech Hawk fairing mounts - (installed after all ... looks OK)
sheepskin seatcover - ( www.goodwool.com )
Givi touring screen - (found on ebay)
mivv decat and suono slipon (http://www.pjsparts.com/)
Denali D2's - ( www.twistedthrottle.com )
SupaBrake brake flasher. ( www.vizi-tec.com )
FatDucs O2 manipulators. ( www.performanceboulevard.com)
Headlight protectors ( www.amhp.com.au )
Touratech Handguards ( www.touratech.com.au )
CP-Wings (handmade in Oz! Thankyou Captain Plummet)
Navihalter GPS mount (from the German website)
Navman EZ45 GPS
Powersports Tapp Lite USB Power Outlet
Red LED lighting friggin' everywhere !
powdercoated bellypans and header guard
Ultimate Accesories, Galaxy SII case and power supply
Custom LED taillight with intergrated indicators as hazzard flasher
TuneBoy Cruise Control and Tuning package (FatDucs removed)
(Removed all the red LED lighting)
TuneBoy QuickShifter
TuneBoy Shift Light
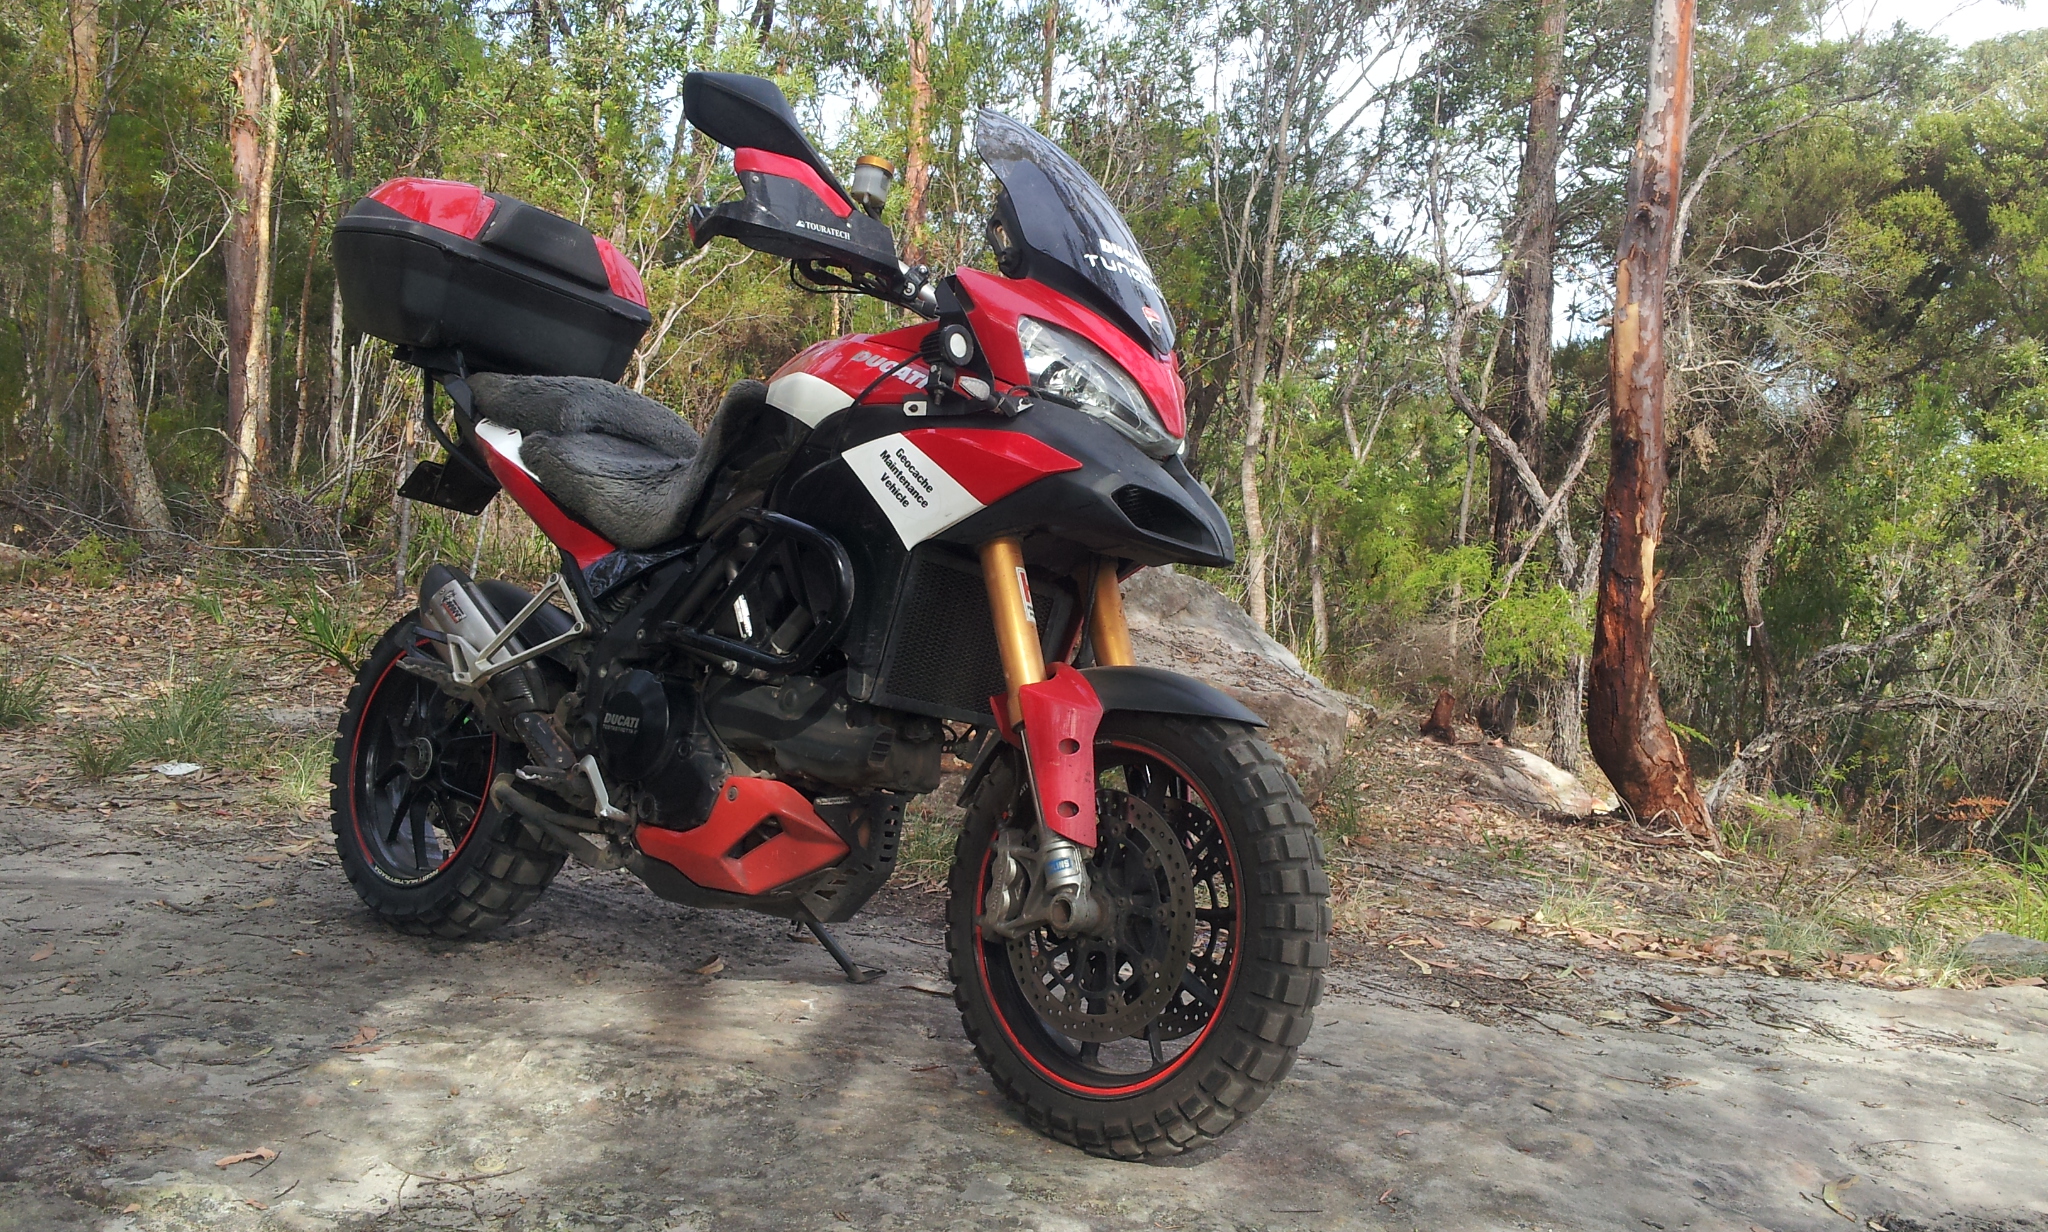
TKC 80 tyres
-----------------------------------------------------------------
WARRANTY ISSUES / REPAIRS
(RAH) Tail light broken off mounting (Oct 2010)
(wrnty) DES rear shock Replaced. (Mar 2011)
(wrnty) CLUTCH SLAVE replaced (Mar 2011)
(wrnty) Front Head Replaced (Jan 2012)
(RAH) indicator failed in CF tail (Mar 2012)
(wrnty) Radiator Replaced (May 2012)
(FFM) chain sprockets and rear disk (Jun 2012)
(wrnty) Fuel Level Sensor replaced (twice) (2013)
(wrnty) Rear Head Replaced (Aug 2013)
(FTB) Replaced both fork seals (Oct 2013)
(oow!) Front Brake line worn through by mudguard (Sept 2013)
(RAH) broken airbox replaced ..don't ask! (Dec 2013)
(RAH) Throttle cable guide broken (Dec 2013)
(nr) Steering Lock often doesn't! (Feb2015 fixed itself ?!?)
(RAH) Fuel Level Sensor replaced again (Nov 2014)
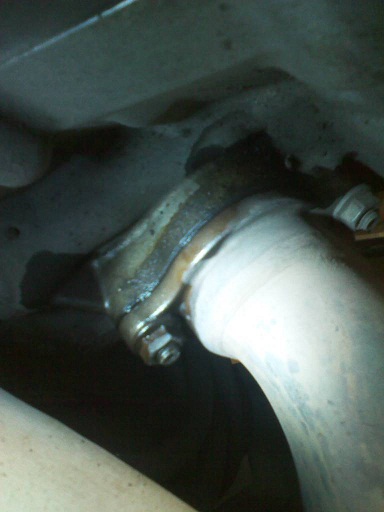
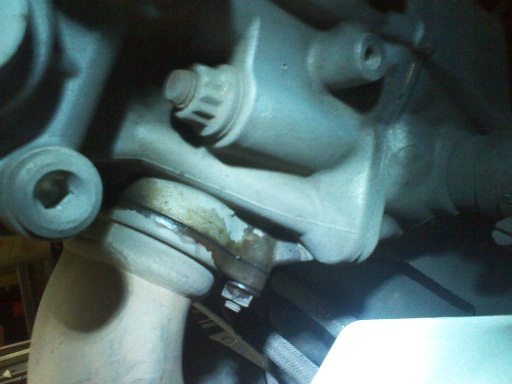
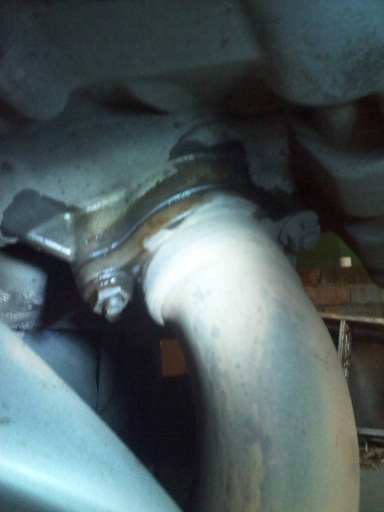
(RAH) Broken vibration damper under sump (Dec 2014)
(nr) Other indicator in CF tail failed (Jan 2015)
(RAH) Clutch MASTER cylinder leaking at piston (Feb 2015)
(FNM) chain sprockets and rear disk (Feb 2015)
(*nr) Fkng Fuel Sensor (again) (Mar 2nd 2015)
*wrnty = repaired under warranty
*oow! = out of warranty
*nr = not repaired
*FTB = fixed by Tuneboy
*FFM = Fixed by Frasers
*FNM = Fixed by Northside
*RAH = Repaired/Replaced at home
------------------------------------------------------------------
Borescope Images Oct 2012
These images were taken on Sunday 28th Oct 2012.
The Great Tck80 Experiment
Tired of putting holes in the Pirelli Scorpion Trails, (as I think I have holed every rear 'Scorion I've ever had..),
I decided to try something, err, different.
Something heavy duty'er...
The TKC80's were calling, and as many have asked, but no one has really responded, I decided to try them myself.
Having worn out two rears now, and with a long road trip up coming, (needing new rubber), I will draw this experiment to a close and re-shoe with road rubber.
After nearly 6000km, I feel I can share my views on the TCK80 on the Multi.
Fitment:
Yes they fit. Although the first rear one refused to seal the bead, and eventually the shop resorted to using
a tube. While this worked OK, I always felt somewhat vulnerable in terms of a roadside repair if punctured. The second rear beaded up nicely tubless'ly!
I think if we had removed the first tire after a day or two and re-fitted it, it would also have sealed properly.
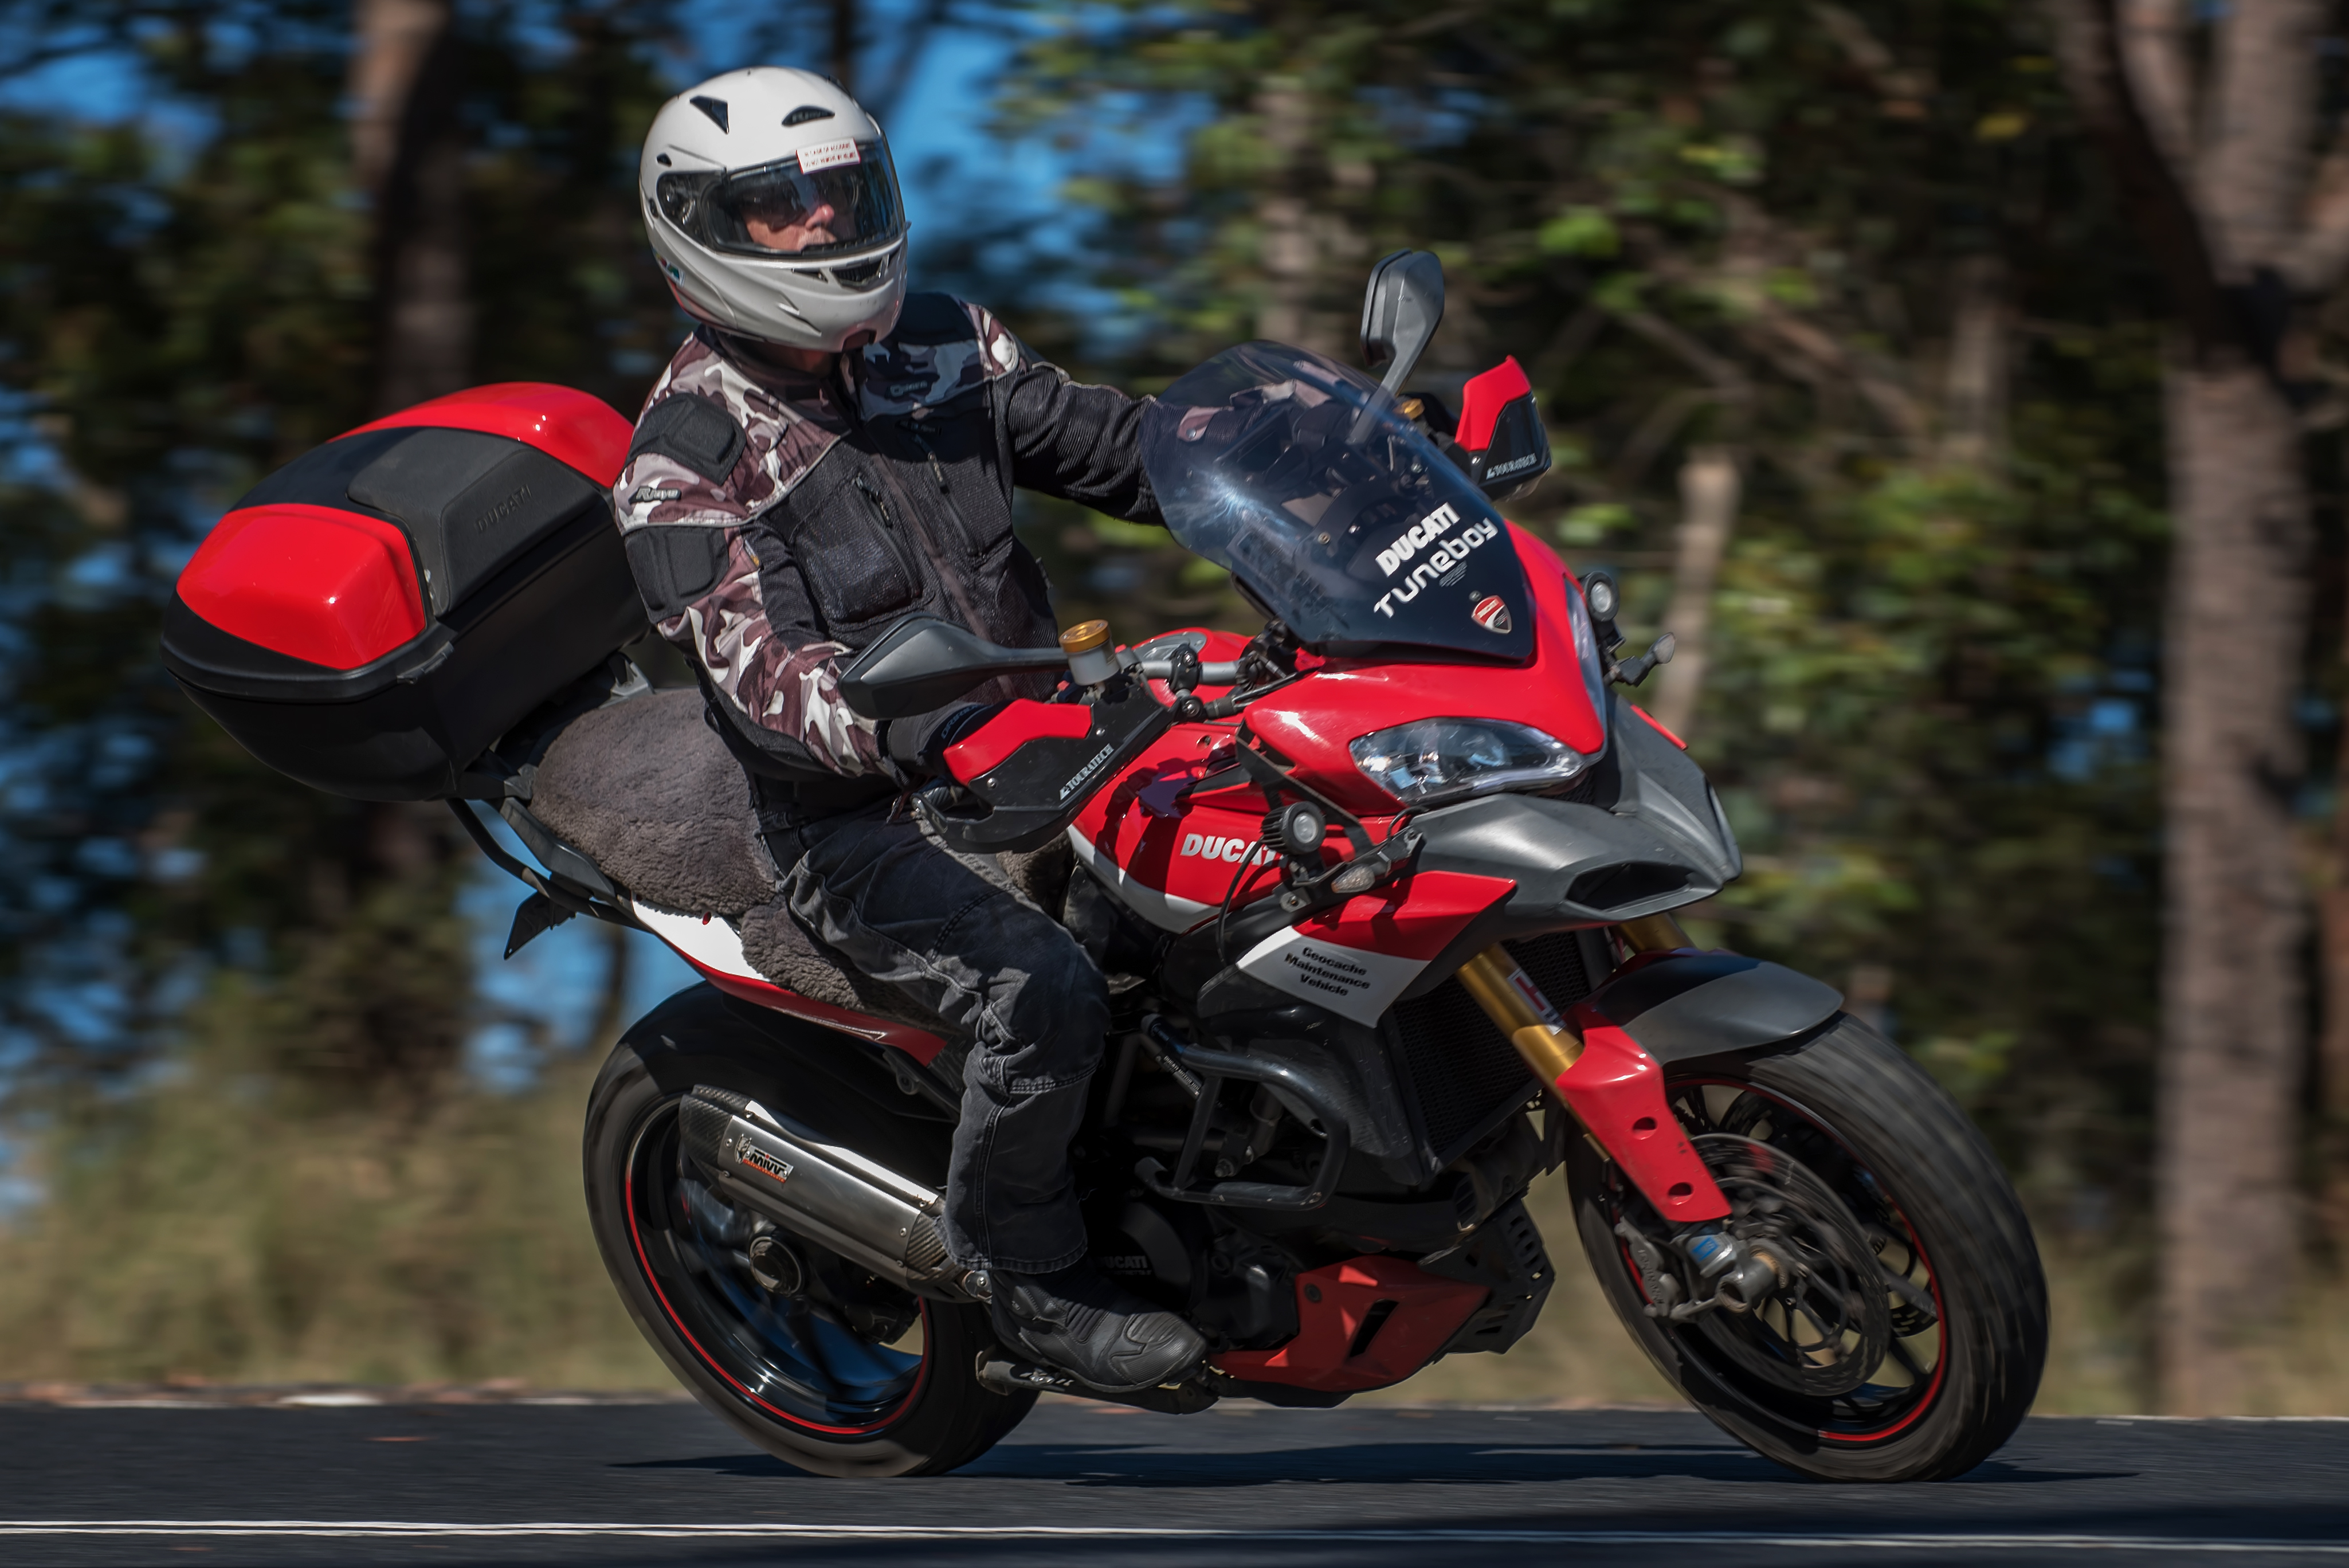
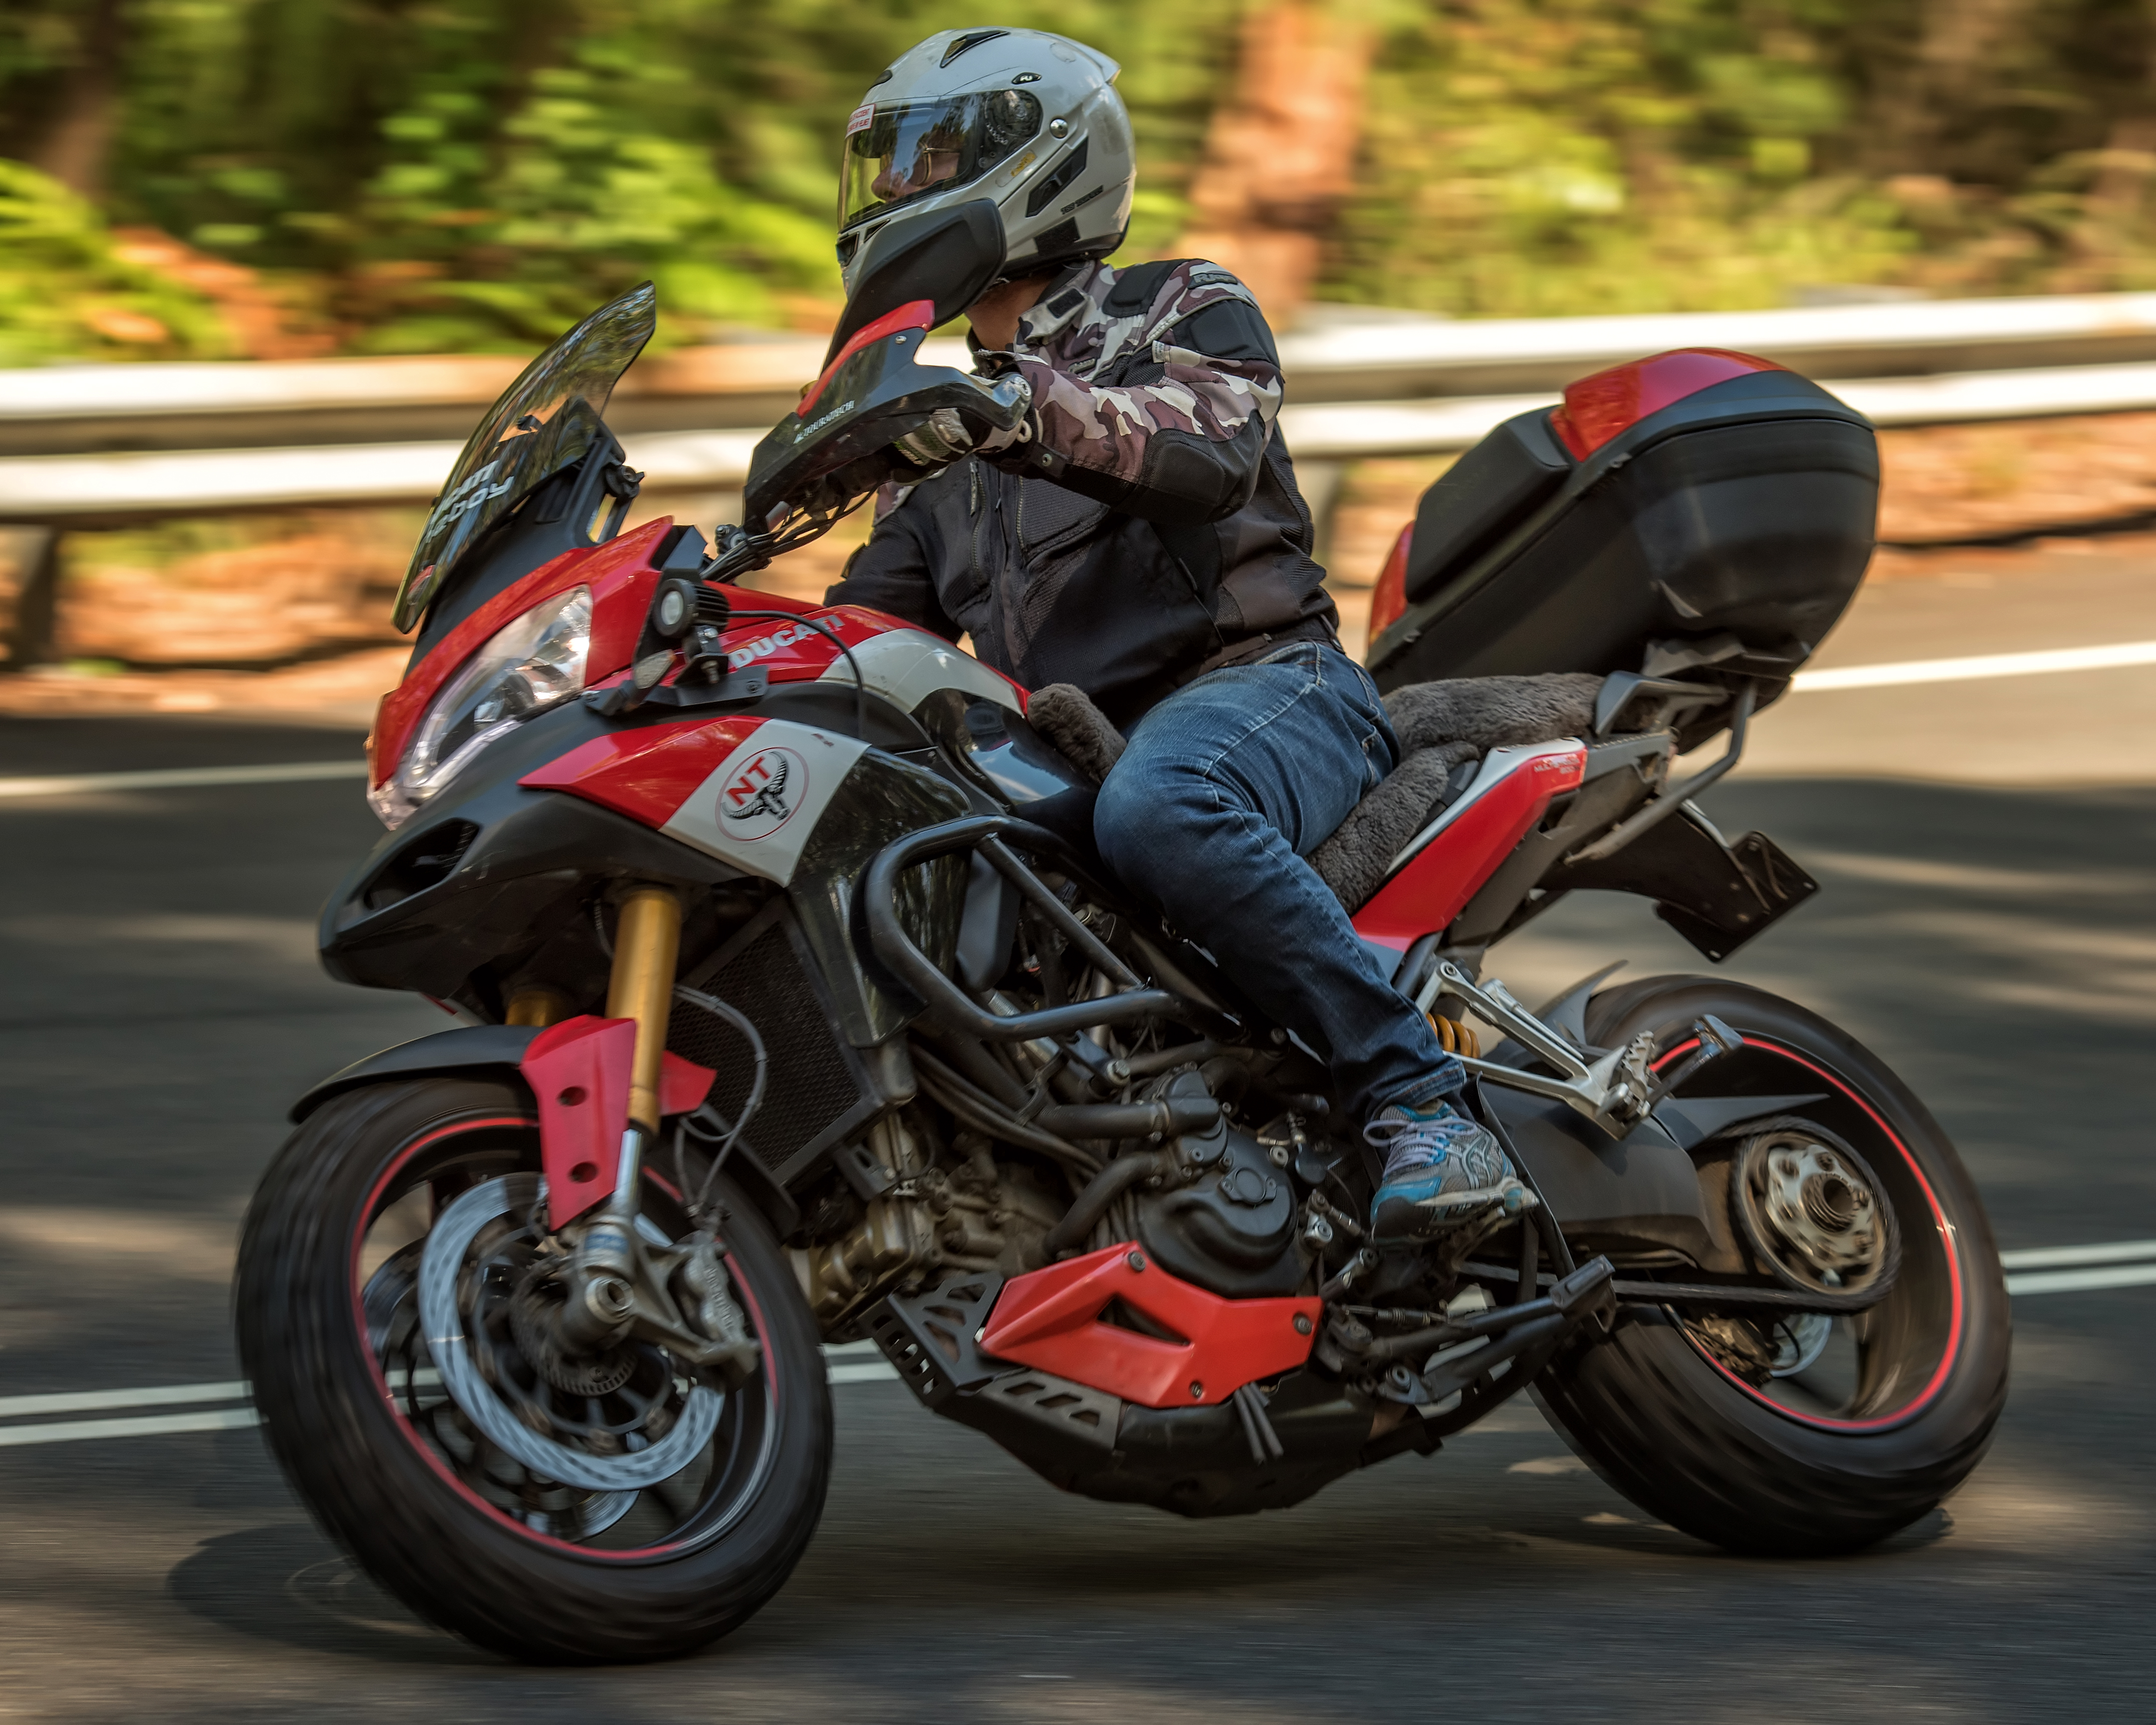
Road Grip:
Yikes ! This took some time to get used to. Initially they did not feel like they would grip. Coupled with the somewhat flattened profile
of the rear tire making turn-in kind of... nothing - then everything, this was a bit of a wake up!
After some initial mileage though, the grip does improve, (as does rider confidence levels).
Wet Grip:
Hmm... not confidant there is much of this going on down there .... Lucky I ride slowly !
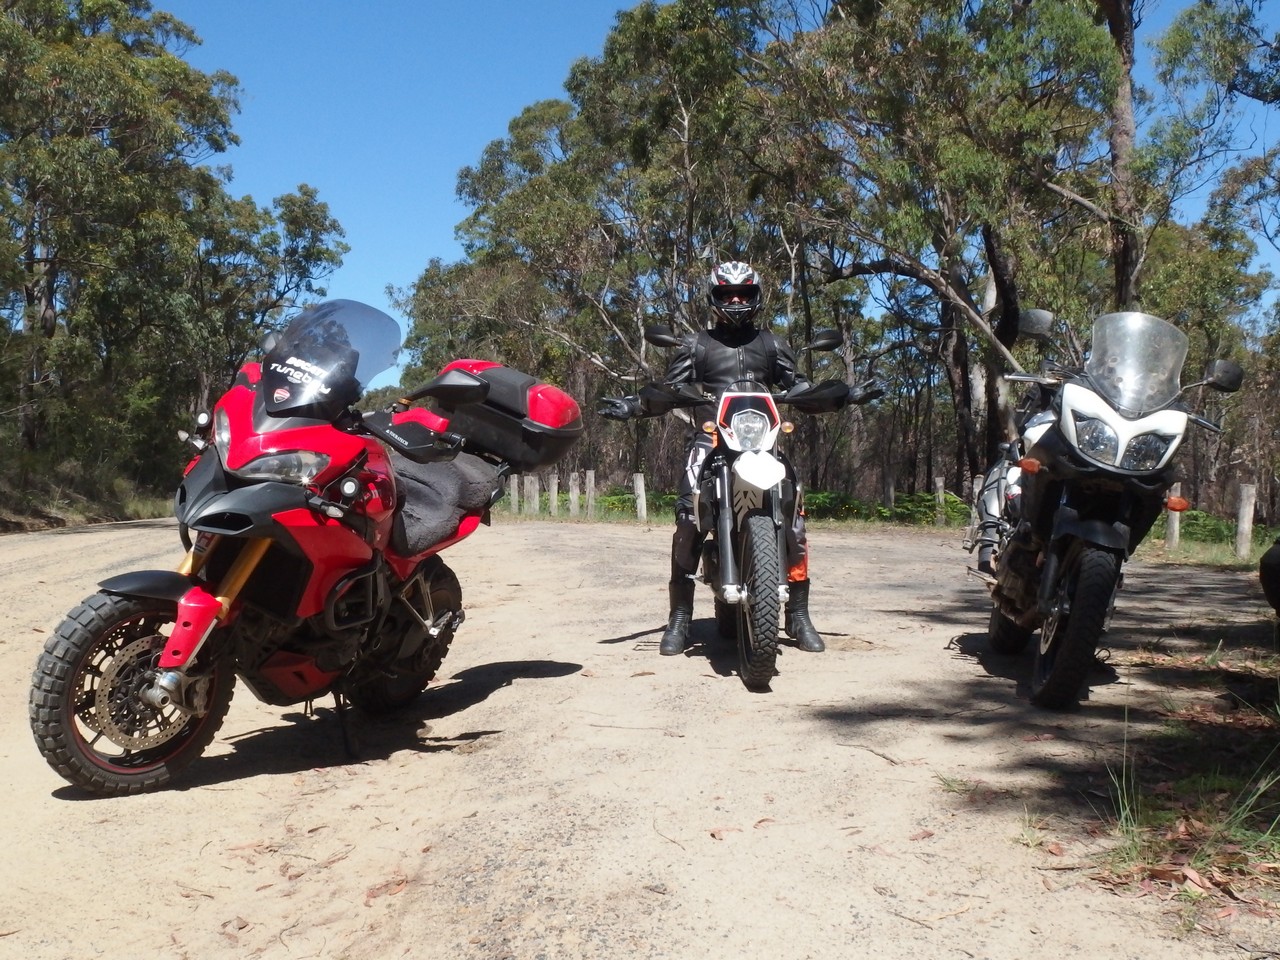
Off-Road Grip:
Yeah! This is what they were meant to do !
The first rear tire did not get much off-road use but a couple of days towards the end of it's life made me feel these would be a good idea if
a long off-road journey was planned.
ABS/TRC:
No issues on the road. (Maybe the ABS kicks in a bit more, but that said, it because the rear slides a bit more).
Turned off when off-road anyway ....
Wear:
Ouch!.. My first rear TKC80 lasted only about 3000km. This was mostly gentle road riding, with just a few days off-road.
The second faired much worse. I was more attuned to how they feel this time and the road punishment went up a notch or two.
I didn't quite make it to 3000km this time.
The front tyre is still looking good after nearly 6000km! (Probably has another 2000km or so in it!)
Looks:
KILLER !!! (They become a huge talking point). Everyone wants to come over and have a look !
Cost:
A little less expensive than the 'Scorps, but not enough to make it a practical decision, unless planning long off-road adventures.
(But if you have a couple of thousand Kays of road to get there ?!?!)
Please e-mail, if you have any interesting additions, tid-bits (or deletions) ...
MadCogz
.jpg)
.jpg)
.jpg)